"Tubing" an Image
The Following is a Quick Little Tutorial on How to "Tube" and Image
This is my way of tubing an image. There are various ways, but I've found this seems to work the best for me. You'll hear the term "tube" referred to quite a bit when working in Paint Shop Pro or in Photoshop. What a tube is (in my own terms) is an image that has all the background taken out of it and what's left is only the part of the image you'd like to use when making a tag. The "tube" is saved on a transparent background and in "psp" format.
Once you have your tube you can either copy it into your "tubes" folder in your psp program, or you can just open it in paint shop pro and work with it from there. I choose to just open it in psp instead of filling up my tube folder in my program.
Let's get started.
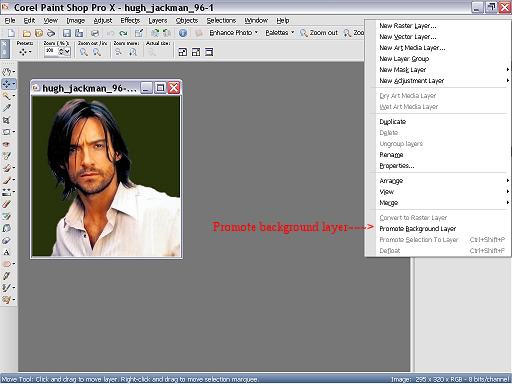
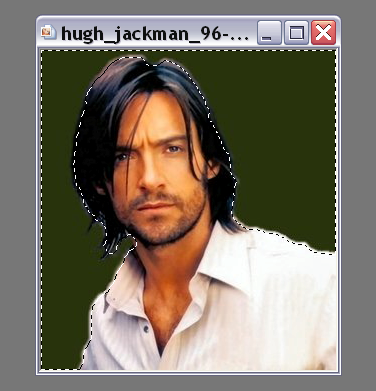
1. Open up the image you want to use in PSP (i'm going to use this image of Hugh Jackman as a sample) 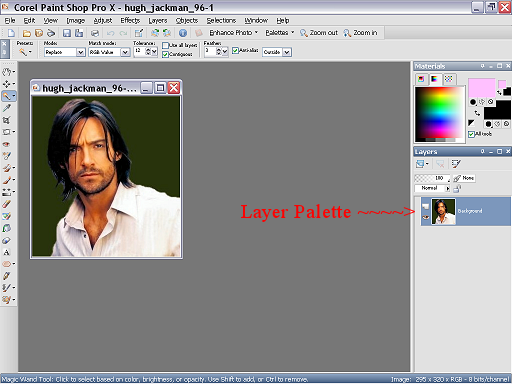 2. Over on your layer palette (see print screen above as to the location) your layer should be labelled "background" Right click on your background layer and "promote background layer" See print screen below. 2. Over on your layer palette (see print screen above as to the location) your layer should be labelled "background" Right click on your background layer and "promote background layer" See print screen below.
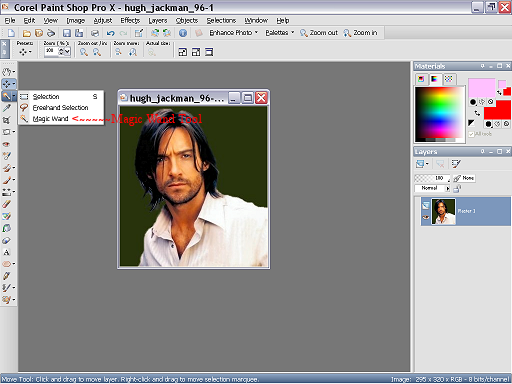
3. Next click on your "magic wand" tool which you'll find on the left which is in the toolbar which runs down the left hand side of your screen. See print screen below.
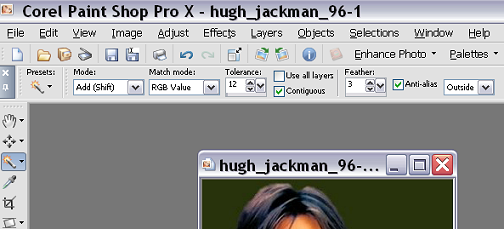
4. Up top on your toolbar set your magic wand with the following settings.
Mode: Add
Match Mode: RGB Value
Tolerance: 12
(this setting you may have to play with depending on the image)
Contiguous: checked
Feather: 3
Anti Alias: checked, outside chosen.
See my print screen below
5. Go back to your image and click on the background area that you want to take out, and you will see "marching ants" surrounding the outline of the area you want to take out.
Note: that in this particular image I'm using it's a solid background so very easily it surrounds the whole are. You may run into an image that has a "busier" background and you may have to continue clicking on the background in different areas until it surrounds the whole area you want to take out. This is why we choose "add" in our wand settings and this is also where you may have to play with the "tolerance" number as well. The higher the tolerance number the bigger area the wand will try to find.
See my print screen below. You will notice the marching ants surrounding the area I have chosen with my magic wand.
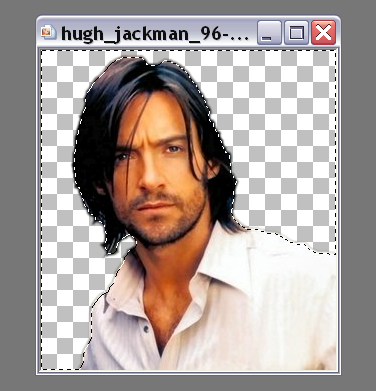
6. Now hit your "delete" key a few times (hit mine 3 times)
You will now see the background has been deleted and it's now transparent.
See print screen below
7. Up top tool bar choose "Selections", then "select none" (or "ctrl D" on your keyboard)
That will remove the marching ants around your image.
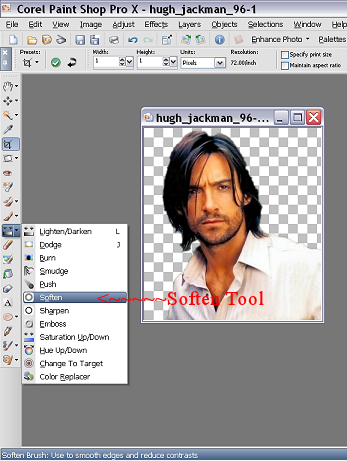
8. You have now got your image "tubed" Depending on the image itself I like to use the soften tool to soften the image up a bit around the edges. This is where a lot of tubers can get lazy in tubing an image and personally I feel it's really important to finish it off so it doesn't have any jagged edges. This is your own personal choice.
To soften the edges go over to your toolbar that runs down the left hand side and choose your "soften tool"
See my print screen below.
I choose the following settings, however you may have to play around a bit with the settings until you get the settings you prefer. See the print screen below for the settings I chose (you will find these settings showing on your top tool bar)

9. Holding down the left side of your mouse, trace around the ouside of your image with your soften tool. You will notice that the edges look softer when you're done.
See print screen below for my finished result.

10. One you're all done softening you can now save your newly tubed image. Go to "File" "Save As" name your new tube and choose the "save type as" - as PSPIMAGE.
YOU'RE ALL DONE!!!
------------------------------------------------------------------------------
Just wanted to add a few other quick tips regarding tubing an image that may also come in useful (other ways of doing things)
A few other ways to soften edges
1. Select the image ("CTRL", "A", and then "CTRL", "F")
2.Choose selections, modify, contract to contract the selection by 1 pixel.
3. Choose selections, modify, feather, feather value of 2
4. Copy this image ("CTRL", "C") and paste as a new image ("CTRL", "V") - the tube should now have much smoother edges! Another way to soften edges Select the image (CTRL + A, and then CTRL + F), and then choose Selections...Modify...Feather to set the feather value. The larger the number, the softer the edge. Too much feathering will cut into the image too much, so start with a lower number. Once you set the feather number you want, invert the selection (CTRL + SHIFT + I), and press DELETE 3 or 4 times - the more you press DELETE, the more of the image gets erased or softened!
|

 Important Announcement


 Prev Message