1. Open new transparent image - 125x50 (size can vary depending on what you want).
2. On color pallette, select colour, gradient or pattern you want in foreground option.
3. Flood fill your image with choice of colour, you'll get something like this -

4. Go to effects > 3d effects > buttonize and select the following values - Height=6, width=9, opacity=68, transparent edge should be selected.
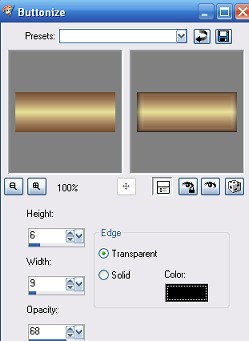
You should now have this: 
Playing around with the settings in buttonize will give you different effects.
To pretty it up:
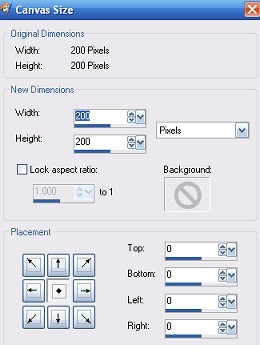
5. Go to image > canvas size and change size of canvas to 200x200, centered.
6. Open up your tube,accent or whatever you would like to add, go to edit > copy
7. Back to button, edit > paste > paste as new layer
8. Resize tube if necessary and move into position.
9. Merge visible layers, you should have:

10. Click on the crop tool (or press R)
11. Crop to size and save as your blank button

12. You can now add text to the blank and just save it under a different name for each button

Alerternatively, instead of using buttonize - use the inner bevel, these settings
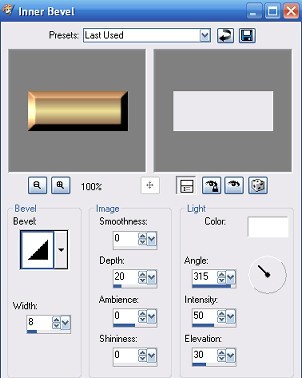
will give this result:
 You can get lots of different results just by playing around with the shapes and settings on the inner bevel.
Again add your tube etc, save your blank button and then add your text.
Tutorial written by Kay

 Important Announcement

 First
First 