
A cute tube that was way too cute to pass up
Tutorial created November 24, 2003
Resemblance to any other tutorial is purely
coincidental.
Supplies
Paint Shop Pro
L & K Filters - Djin
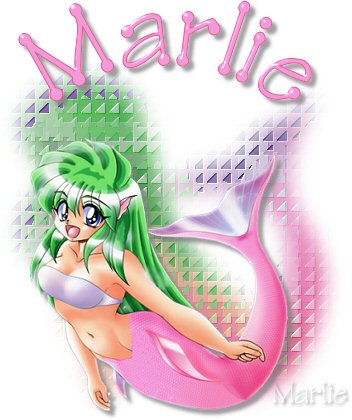
Tube
Font
**Unzip tube and open in PSP, unzip font and minimize
in your taskbar**
1. Duplicate your tube and close the original
Image - Canvas size - 500 x 500
2. Duplicate the tube layer - hide the copy layer
3. Ensure you are on the first tube layer
Effects - Blur - Gaussian Blur - Radius - 10.00
4. Effects - Distortion Effects - Pixelate
5. Effects - Plugins - L en K landksiteofwonders - L en K's Djin

6. Unhide the copy of tube layer
Resize 85% - Bicubic Resample
Effects - 3D Effects - Drop Shadow
7. Layers - New Raster Layer
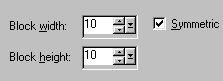
Activate your Preset Shapes Tool and choose the Ellipse
Set up as shown below

Draw out an Ellipse over your image as shown
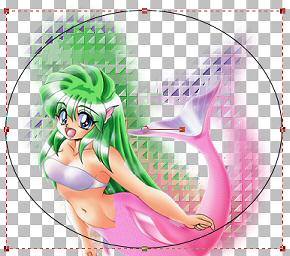
Use the Mover Tool to arrange the ellipse over your image
8. Click on your Text Tool
I used color - #62d570
This is how I set mine up

Move the cursor close to the edge of the circle and your cursor will
change into an A with a half circle underneath.
Click the left mouse button to type your text in
Once you have your text completed, open the layer palette
Right click on the Floating Selection and Promote Selection to Layer
Click on the Vector Layer and Delete
Answer yes to wanting to delete
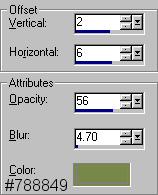
9. Effects - 3D Effects - Inner Bevel
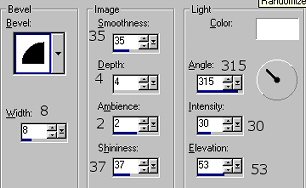
Effects - 3D Effects - Drop Shadow
Use the same settings as before
10. Layers - Merge - Merge Visible
Edit - Copy
Edit - Paste As A New Image
This will get rid of all the excess canvas
Layers - Merge - Merge All (Flatten)
If necessary, resize your tag
I resized 75% - Bicubic Resample
Here is another one I did
I sure hope you enjoyed it
Thank you so much to my testers

Adri

MaryBear

Tutorial, Page Design, and Graphics © Marlie's Place 2003
http://marliesplace.net/tutorials/turtlelove.html

 Important Announcement

 First
First 