over on the layer palette duplicate your frame on the original go to adjust/blur/gaussian blur/ radius 4. push ok
then go to effects/distortion effects/ curlicues with these settings.push ok

open up your first tube (im using RM greenflower) paste as a new layer on your canvas.resize by 70% and then use your deform tool to fit her inside your frame.move this tube to the far right side of your frame . if your using a different tube just resize to fit in the frame. and move over.
open up your next tube (im using RM mysterious beauty) rize like you did before and fit inside the frame.and move over to the left.
lower the opacity of this tube to around 50%, go to your free hand tool (selection type: point to point )mode-add (feather set to 10)
draw around your first tube on the side like this
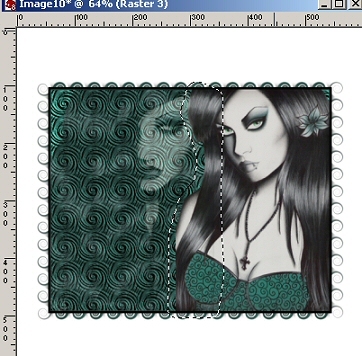
marching ants will be around your selection, hit delete on the keyboard.selections/select none.
x out your background layer (your white layer) and merge visible the other layers.
now move this layer down a little bit ,copy and paste your chain as a new layer and move to the top of your tag. copy and paste the silver brad as a new layer and move to the right hand side of the chain, duplicate and mirror..do the same with the charm. and move your charm layer underneat the silver brand on both sides.(charm has two layers so you can chose to use the green color in the middle or not. If you use the green color then on the top right click copy merged and then paste on the tag. add drop shadow of your choice.
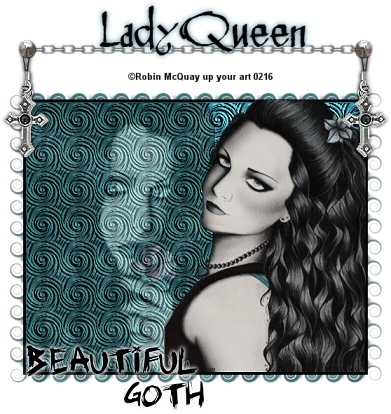
(check finished tag for placement)
next chose a word art phrase and paste it as a new layer onto your tag..( I am using gothic charm) place it at the far left bottom of the tag. add a drop shadow with these settings. effects/3d drop shadow.
Vertical &horizonal = 0,opacity =100, blur = 8.00 color white..you may want to add the drop shadow again just to make it brighter thats up to you.
k now its time to add your name..background color black and foreground set to null..size 48 if your using the same font as me.type out your name hit ok. now dupliacte your name and on the original go to adjust blur/gaussian blur = 4
now to colorize your blurred name layer..make sure your foreground color is set to the color of your choice or use mine #367469, settings dont matter..take your mouse ,hold down your left side of the mouse and go across your blurred name. this will change the color.
k ,now we are finished ,just add your proper copyright to the tag and license number if needed . resize if needed..I resized mine by 80% merge visible all layers and save tag as jpeg.
hope you enjoyed this tutorial as much as I enjoyed writting it for you. :)
heres another example


 Prev Message


