Go to ‘File�?‘Browse�?and locate the folder with your tube, double click the tube to open it .
‘File�?‘Export�?‘Picture Tube�? Type in the name for your tube and ‘OK�?it. It will now be in the menu ready for use when you click on the ‘Picture Tool Tube�?icon
‘File�?�?New�?and open a new image 400 x 400 transparent.
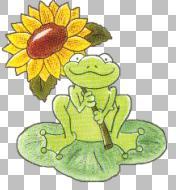
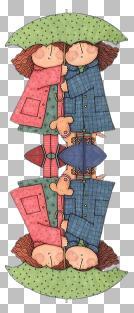
Click on the’Picture Tool Tube�?icon  and from the menu select your tube. Ive used Umbrellagirls scaled down to 50. Click on your blank image to add the tube.
*** NB: If the picture you want to use doesn’t have a flatish bottom and is like this for example........
.....using the crop tool  draw round your image leaving the bottom off, click on the tick
  on your 'Tools Options - Crop Tool' box to crop for PSP8 or use 'Image' 'Crop' for PSP7
then click on the ‘Copy�?icon  or 'Edit' 'Copy', go to ‘File�?‘New’�?. open a ‘New Image�? Making sure the new image is active [the bar at its top should be blue, if not just click on it]…click on ‘Edit�?‘Paste�?‘Paste as New Layer�?and your image will appear ready for you to continue. ***
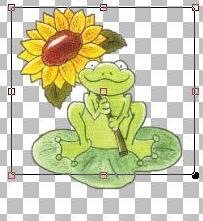
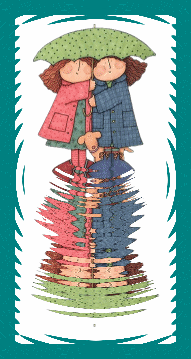
So to continue, we have our tube on our image so next, using the ‘Mover Tool�?nbsp;  position it towards the top of your image as you need room beneath for the reflection.
‘Layers�?�?Duplicate�?
You will now have a duplicate image directly on top of the original and you will now see ‘Raster 1�?and ‘Copy of Raster1�?in the 'Layer 'palette [for PSP8]....or....
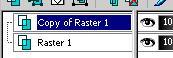
....'Layer1' and 'Copy of Layer1' if you're using PSP7
Go to '‘Image�?�?Flip�?and using the ‘Mover Tool�?nbsp; postion the reflection below the main image.
‘Layers�?�?Merge�?�?Merge all flatten�?/FONT>
Using the ‘Crop Tool�?draw it round your image to remove the excess
Click on the ‘tick�?on your ‘Tool Options �?Crop Tool�?palette to crop [PSP8]
or 'Image' 'Crop' [PSP7]
Click on ‘Image�?�?Add Borders�?/FONT>
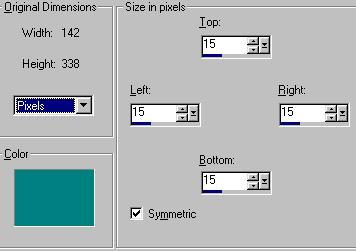
In the ‘Add Borders�?box [example below] ignore the settings for ‘width�?and ‘height�?as those are my own image size, yours could well be different.
Tick ‘Symmetric�?and set the size for top, left, right, bottom to 15 .Click on the coloured box to choose a border colour. Don’t choose white or the next step with the magic wand won’t work because the background of your image is white.
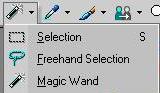
Using the magic wand (you might find it hiding in a sub menu).....
click inside the border and you will see marching ants inside and outside

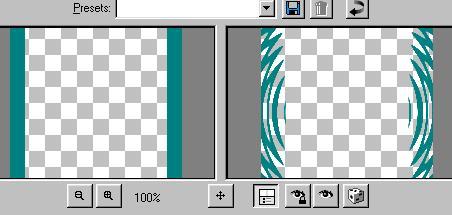
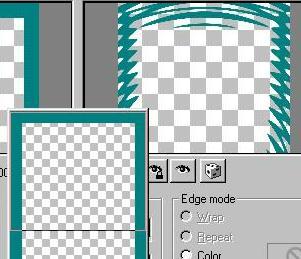
Go to ‘Effects�?‘Distortion Effects�?‘Ripple�?and set your settings to these.

You will see your ‘before�?and ‘after�?/FONT>
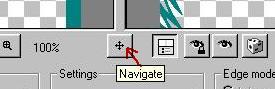
To navigate around the ‘after�?image click and hold your mouse on the crossed arrows and you can slide a viewing square up and down your image.
Click on ‘OK�?and go to ‘Selections�?‘Select None�?to remove the marching ants.
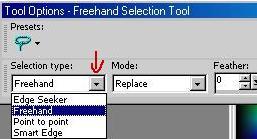
Click on the ‘Freehand Selection Tool�?(you might find it hiding in a sub-menu)
And have ‘freehand�?and ‘feather 0�?selected
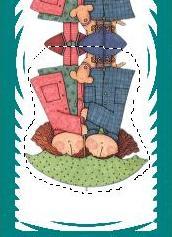
Draw loosely round the reflection image


 Prev Message