Adding a Background from the Photo Album:
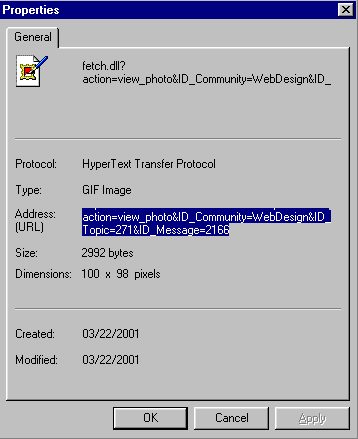 | To add a background to a custom page or message, first put your background into the photo album. Then open to full size. Right click on it, choose properties, highlight the url - (you must scroll to get it all or triple-click on it), and copy (Control+c). You then should paste to note pad so you will have it if you need it again later. |
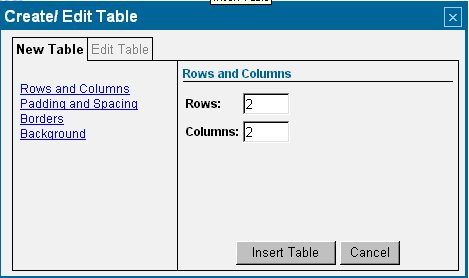 | On your page or message board where you want the background, put your cursor where you want the table to be and click the table icon from the edit menu. Change the columns and rows to 1, and create the table as usual. |
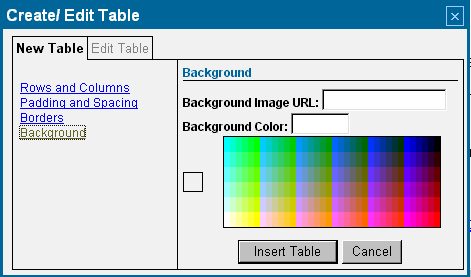 | When you click on 'Background' this window opens and you paste (use control V) into the box (you may also choose a color to go behind the graphic if you like). Click Insert Table and you are done. Note that there will be a tiny little box with the background in it. Put your cursor in the box and build your page inside of it. |
| NOTE: If you are changing an existing background or adding one after the table has been created, you must click on the EDIT TABLE tab (which is the grayed out tab heading in the illustration above). The old URL will show in the URL location if you had a background previously. Delete that and control+v copy in your new one. The button at the bottom will say "Update Table" instead of insert table. |
Adding a Background to a List page item: You still have to use tables to get a background color on a list item, and there will be "white space" between list items. The background color only shows on the Details View, not on the List View version of the page.
You can pretty much copy an entire MSN Custom Web Page into a list item in the Description box, if you wanted! Like a custom page or mail message, you can only get a background if you insert a table. Of course all the formatting rules apply, so if the list entry is short, the table will be small. If it's large, it can cause a hugely wide page and side scrolling! But if you are sure you want a common background on every item in your list page, here's how:
- Open the new page
- Click on More...
- Click on Change the Settings
- Click on Customize Details View
- Position your cursor in the editing box and insert a 1x1 table and follow the instructions above to insert the background.
- Drag the link and Description into the table and arrange them as you prefer - You can also remove the dash between the Link and Details forms that is the default setup for a list page, or add a paragraph break (enter key) or line break (shift+enter) between them
- Click the "show details view as default" radio button and enter the number of entries to display on a page
- Check the box under Default Sort Order (this saves the order the list items are in)
- Click on Save Settings
Adding a Background from the File Cabinet or other web location: Upload your graphic to the file cab or other web site that you have access to. Everything works the same way, except you copy the URL from the browser address bar of the open graphic. Paste that URL into the 'Background Image URL' location in the Table Background tool. Note that since MSN locked the file cabs, non-members and members who are not signed into MSN Groups will NOT be able to see the backgrounds.
Using Double Backgrounds & editing the table html code
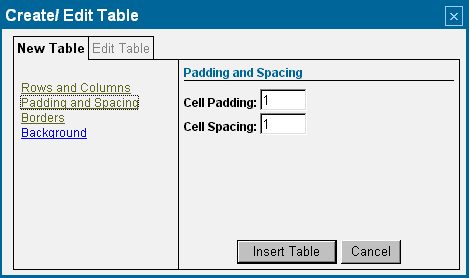 | Easiest way: Create the outer table as per the first item below, but set the Cell Padding to the pixel width you want - try 30 for wider outer table margins, and 2-4 for narrow ones. This ensures the identical amount of space around all 4 sides of your tables.
|
The outer Table: After you insert the table and center it, you will see this code when you look in the html view - it will be between the < open and > close of the <TABLE<>specifications (can't put the actual code here without it turning into a table!):
You want to add this to it: width="100%" although it's not necessary because the table will stretch to the full MSN page width - or more if you put too much in it. You can also use a specific number of pixels - e.g. 622 width="622" when centered gives you the smallest equal sized sliver of white space on either side of your main background table (if you haven't stretched your nav bar wider than the normal width). Add the width statements in after the Cell Padding command, and before the close of the table specification >. The inner tables(s): Ensure there are no excess spaces or paragraph breaks in the outer table. Now insert a second 1-celled table into the outer one. It will be automatically centered if you used the Cell Padding specification noted above. Repeat for additional tables, editing the the number of pixels for Cell Padding to the amount you require. 
 Important Announcement

 First
First 