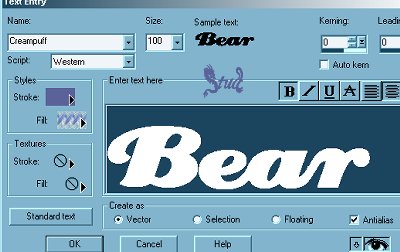
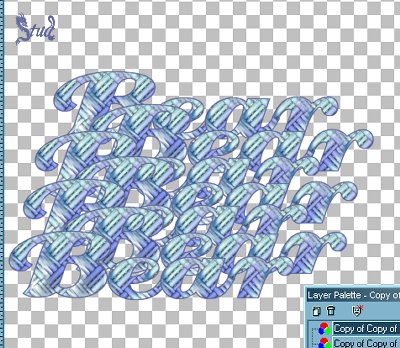
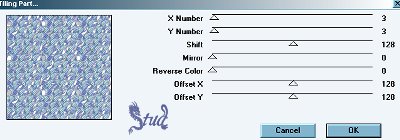
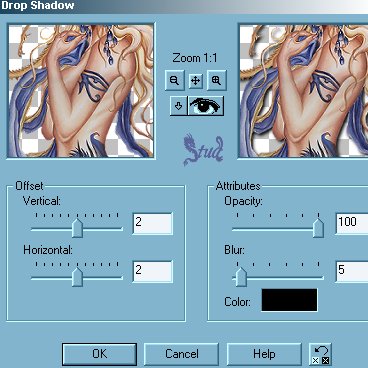
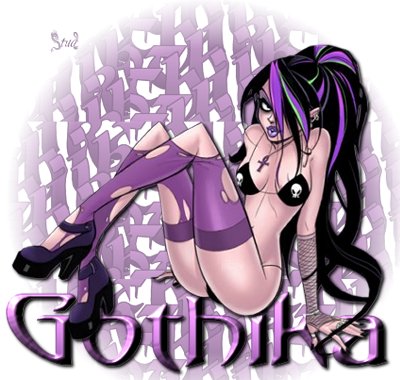
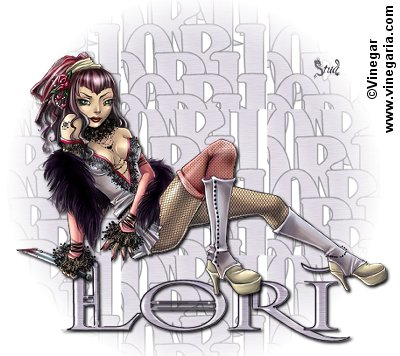
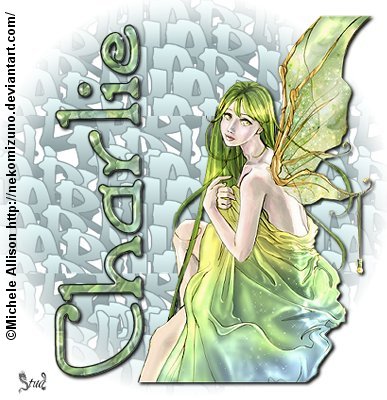
Circular Tiled Text Tag 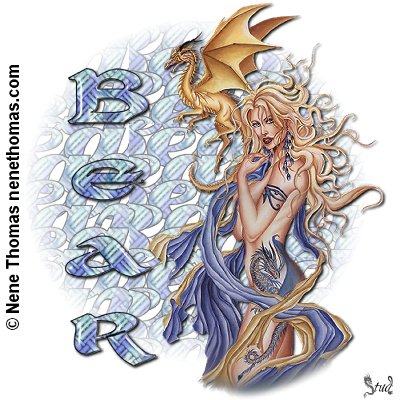 This tutorial is my own creation, any similarity is purely coincidental! This tutorial was written August 6th 2005. Please feel free to LINK to this tutorial and/or print it out for your personal use, but please do not copy it in anyway to put online, pass out or re-write without my permission ©§tud Supplies PSP A tube of your choice 2 fonts of your choice pattern and/or gradient of your choice circle mask MuRa's Seamless Filter here Lokas Gel Filter (optional) here The Supplies I have included are the mask and the Nene Thomas tube... please make sure you add her ©info if you use it. Here See her web page here http://www.nenethomas.com/ This tutorial is my own creation, any similarity is purely coincidental! This tutorial was written August 6th 2005. Please feel free to LINK to this tutorial and/or print it out for your personal use, but please do not copy it in anyway to put online, pass out or re-write without my permission ©§tud Supplies PSP A tube of your choice 2 fonts of your choice pattern and/or gradient of your choice circle mask MuRa's Seamless Filter here Lokas Gel Filter (optional) here The Supplies I have included are the mask and the Nene Thomas tube... please make sure you add her ©info if you use it. Here See her web page here http://www.nenethomas.com/ 1. Open a new, blank image 500 x 500 pixels transparent image (16 million color depth). File > New > set size & set color depth 2. Open one of your fonts and minimize it to your toolbar. Open your tube and select 2 colors from your tube if you're using a gradient. If you're using a pattern, choose one that either matches or co-ordinates with your tube. Either way make sure your foreground is a dark color from your tube! Minimize your tube for now. 3. Create your background text, size is dependent on the length of your text, I used size 100 for Bear but only 72 for Gothika's version! Create as vector and antialias both checked. Resize and position somewhere in the middle of your canvas. When happy, convert to raster. 4. Right click on this layer and duplicate it. Click on the mover tool and move it slightly down and to the side. Do this 5 or 6 times (more if desired) until it looks similar to the picture below. Then click on Layers > Merge > merge visible. 5. Effects > Plugin Filters > MuRas Seamless > Tiling Part... settings: X Number ~ 3, Y Number ~ 3, Shift ~ 128, Mirror ~ 0, Reverse Color ~ 0, Offset X ~ 128, Offset Y ~ 128. Play to see what else this filter does!!! 6. Open the circular Mask and make the text canvas live again. Masks > New > from image > select Nemsfuzzymask from the drop down list. Masks > invert. Masks > delete > yes. Then reduce the opacity on the layer palette. This also depends on how dark your background colors are... Bear's was reduced to 55, Charlie's only to 70, so play and see how you like it. 7. Restore your tube, copy and paste as new layer on top of the circle of text. Resize and position as desired. Click on Effects > 3D effects > Drop Shadow with the settings: vert & hori ~ 2, Opacity ~ 100, blur ~ 5, color ~ black. 8. Open your 2nd font and add your text with create as a vector and antialias both still checked. Change the fill if desired so it stands out a bit more but still fits with your color scheme, it's your chance to play. Have your text in any way, shape and form you wish! If you know how to glitter it then... go ahead and make my day! lol Convert to raster when it's the size and position you like! 9. Now is the chance to use the Lokas Software if you wish, if not find an inner bevel you like from Effects > 3D effects > inner bevel... Eye Candy 3.1 glass or 4000 glass can be used too... just mess about and let's see how they turn out!!! For the Lokas... effects > plugin filters > lokas and play about til you see a version you like! Just make sure the color overlay is UNchecked or you'll lose the pattern/gradient you've used. When you've got it how you like add the same drop shadow that you did to your tube. 10. Image > resize... no larger than 400 pixels and choose bicubic resample from the list at the bottom. 11. Add a new raster layer for your watermark or brush and another for any © info you need to add. I resize BEFORE adding the © so it's legible for everyone. Save it as a Jpeg and you're done! I hope you enjoy this tut! Below are a couple of alternatives to show what else you can do. Gothika's text was an inner bevel version. | 
 Important Announcement
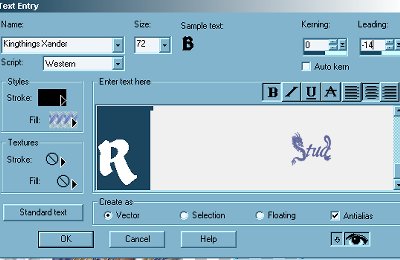