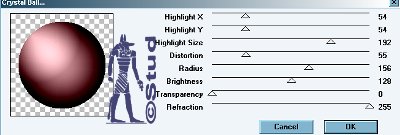
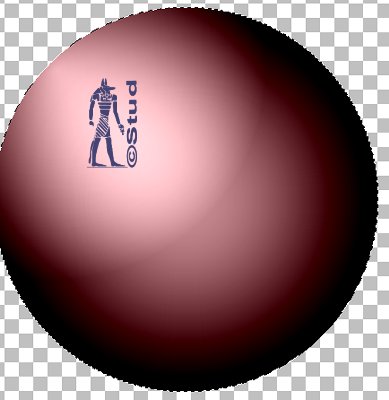
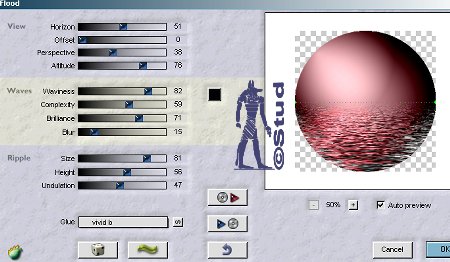
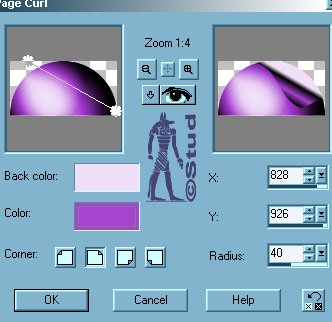
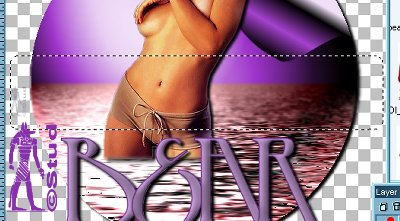
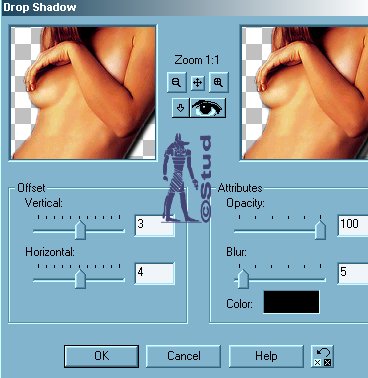
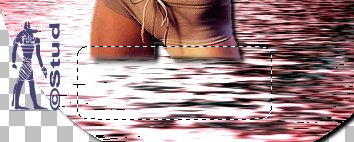
Crystal Ball 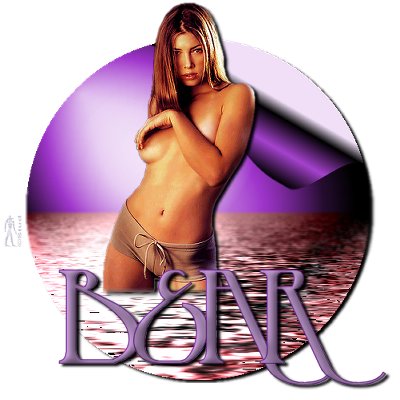 This tutorial is my own creation, any similarity is purely coincidental! This tutorial was written March 4th 2006. Please feel free to LINK to this tutorial and/or print it out for your personal use, but please do not copy it in anyway to put online, pass out or re-write without my permission Supplies PSP Tube and font of choice Filter Factory B Crystal Ball HERE Flaming Pear Flood Filter HERE (this is a pay filter BUT you can d/l it for a trial period!) This tutorial is my own creation, any similarity is purely coincidental! This tutorial was written March 4th 2006. Please feel free to LINK to this tutorial and/or print it out for your personal use, but please do not copy it in anyway to put online, pass out or re-write without my permission Supplies PSP Tube and font of choice Filter Factory B Crystal Ball HERE Flaming Pear Flood Filter HERE (this is a pay filter BUT you can d/l it for a trial period!) 1. Open a new, blank image 500 x 500 pixels transparent image (16 million color depth). File > New > set size & set color depth 2. Open your tube and choose a color from it, use this to flood fill your canvas, Effeects > Plugins > Filter Factory B > Crystal Ball with the settings: Highlight X ~ 54, Highlight Y ~ 54, Highlight size ~ 192, Distortion ~ 55, Radius ~ 156, Brightness ~ 128, Transparency ~ 0, Reflection ~ 255. 3. Selections > select all > selections > float. 4. Effects > Plugins >Flaming Pear > Flood with settings: Horizontal ~ 51, Offset ~ 0, Perspective ~ 38, Altitude ~ 76, Waviness ~ 82, Complexity ~ 59, Brilliance ~ 71, Blur ~ 15, Size ~ 81, Height ~ 56, Undulation ~ 47. Glue ~ Vivid B (you have to click on the word Normal and hold the mouse button down, then drag across to select Vivid B). Deselect. 5. If you want to change the top half color (as this is optional), click on the selection tool > rectangle > feather ~1, antialias checked. Select the top half from the waterline upwards and click on Colors > colorize and select the color you would like, I used Hue ~ 200 & Saturation ~ 150. Keep selected. 6. Effects > Geometric Effects > Page Curl. Click on the top right curl choice and use the settings: X ~ 828, Y ~ 926. Move the mouse away from the page curl dialogue box and over your crystal ball and right click on a fairly dark color to shange the main color of the curl and left click on a light color to change the back color. Click ok and deselect. 7. Click back on the selection tool, still with the rectangle but with feather set to 7 and select a little of the top and bottom halves and click on Effects > Blur > blur. 8. Add an inner bevel of your liking if desired then add a drop shadow of Vert ~ 3, Hor ~ 4, Opacity ~ 100, Blur ~ 5, color ~ black. 9. Add your tube and resize and position as desired. Add the same drop shadow as the circle. Click on the selection tool with feather still set to 7 and select a small amount of the bottom of your tube and hit delete once or twice to give the effect that the tube is coming out the water! 10. Add your text with antialias and create as vector both checked, resize and position as desired then convert to raster layer, add an innver bevel and drop shadow of choice or use a different effect from another filter ie Lokas if you wish. Add another raster layer for your watermark and/or brush, resize your tag so it's no more than 400 pixels on its longest side and save as a jpg. |

 Important Announcement