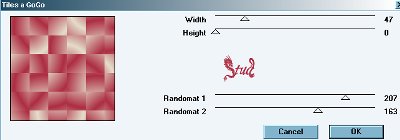
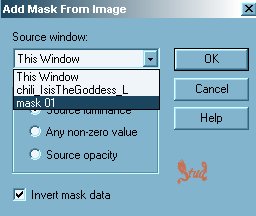
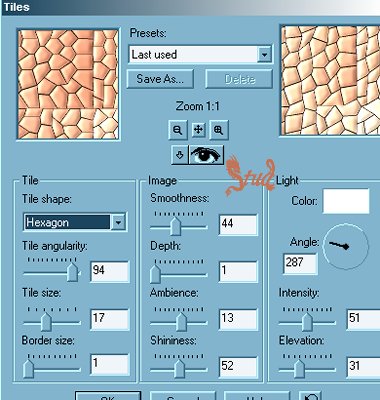
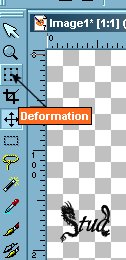
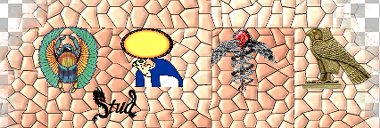
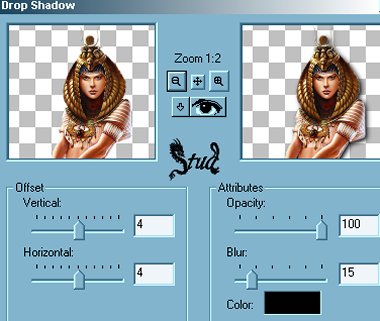
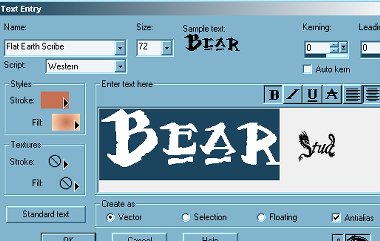
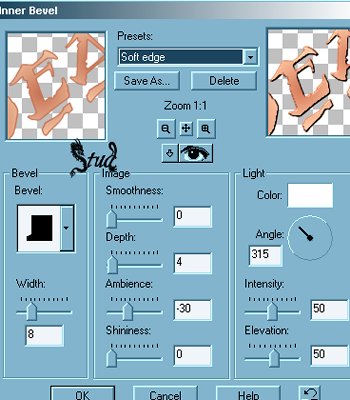
Egyptian Wall 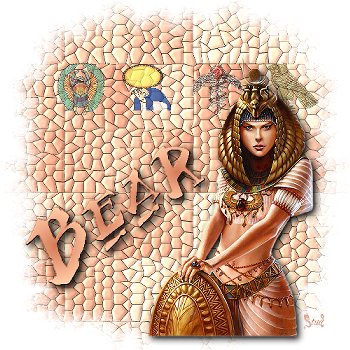 This tutorial is my own creation, any similarity is purely coincidental! This tutorial was written June 12th 2005. Please feel free to LINK to this tutorial and/or print it out for your personal use, but please do not copy it in anyway to put online, pass out or re-write without my permission ©§tud Supplies PSP (written in7 hopefully do-able in other versions!) Choice of tubes &/or accents VM Distortion (HERE) The Egyptian tubes, the mask and font I used are in 2 zip files here Download the Filter with PSP closed and add the mask and tubes to your tube files This tutorial is my own creation, any similarity is purely coincidental! This tutorial was written June 12th 2005. Please feel free to LINK to this tutorial and/or print it out for your personal use, but please do not copy it in anyway to put online, pass out or re-write without my permission ©§tud Supplies PSP (written in7 hopefully do-able in other versions!) Choice of tubes &/or accents VM Distortion (HERE) The Egyptian tubes, the mask and font I used are in 2 zip files here Download the Filter with PSP closed and add the mask and tubes to your tube files 1. Open a new, blank image 500 x 500 pixels transparent image (16 million color depth). File > New > set size & set color depth 2. Open your main tube and select 2 colors to create a gradient which you will find at the beginning of your gradient list. Choose how your gradient will look... either with repeats or angles or both etc! Personalize your tags by doing each one different! Then select the paint pot and fill the blank image. Reduce the opacity to 90. 3. Effects > Plugin Filters > VM Distortion > Tiles a Go Go with the settings: width ~ 47, Height ~ 0, Randomat1 ~ 207, Randomat2 ~ 163. Play with these settings to make your own mark on this tut! 4.Open the mask01 and minimize it, make sure the tiled canvas is active. Masks > New > From New Image and select the mask01 from the list with source luminence and invert mask data both checked. 5. Effects > Texture Effects > Tiles with settings: Tile shape ~ hexagon, tile angulations ~ 94, tile size ~ 17, border size ~ 1, smoothness ~ 44, depth ~ 1, Ambience ~ 13, Shininess ~ 52, color ~ white, angle ~ 287, Intensity ~ 51, Elevation ~ 31. Play with these settings to make your own mark on this tut! 6. Open your accents or tubes and copy and paste each one as a new layer. Use the deformation tool to resize them to be a painted mural along the top of the wall. If you're using my egyptian tubes I did Image > mirror, on the gold bird then repositioned it, but play and see how you're happy with them. Hide layer 1 (your wall layer), Layers > merge > merge visible and then reduce the opacity so the wall starts to show through... approx 65. 7. Go back to your main tube, copy and paste as a new layer, resize and position as desired. Effects > sharpen > sharpen. Effects > 3D effects > drop shadow with the settings: V & H ~ 4, Opacity ~ 100, Blur ~ 15, color ~ black 8. Open your font and minimize it to your toolbar. Use the same color settings as your wall and with create as vector and antialias both checked. Size is dependent on your text length. Position and resize as desired, convert to raster layer by right clicking on the layer on your layer palette. 9. Effects > 3D effects > Inner Bevel > soft edge preset with the settings: width ~ 8, smoothness ~ 0, depth ~ 4, Ambience ~ -30, shininess ~ 0, color ~ white, angle ~ 315, intensity ~ 50, elevation ~ 50. Add the same drop shadow as in step 7. 10. Add a new raster layer for your watermark. Layers > Merge > Merge visible. Image > resize...it should be no longer than 400 pixels 11. Add a new raster layer for any copyright information you need.... save as a jpeg Hope you enjoyed doing this tutorial.. would love to see your results! This version was done with accents along the top. | 
 Important Announcement