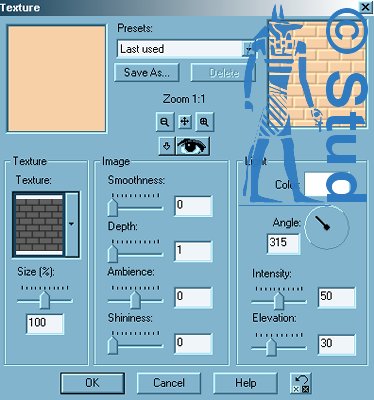
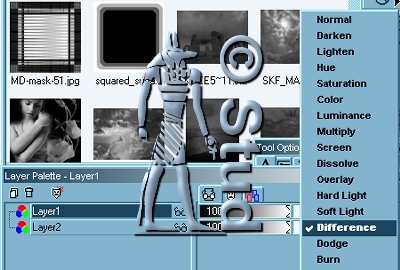
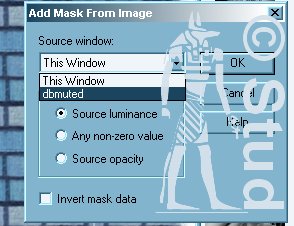
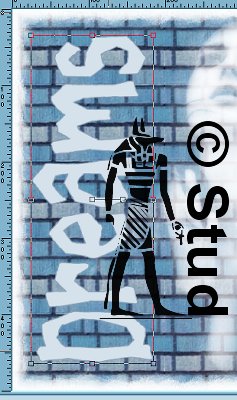
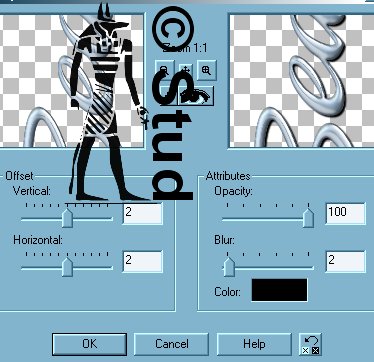
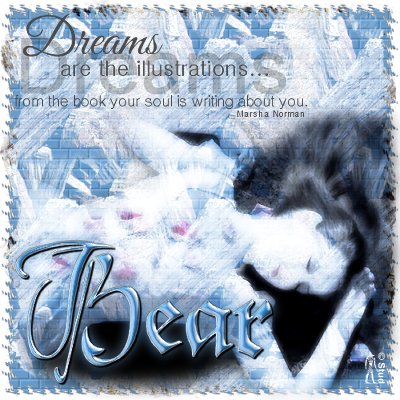
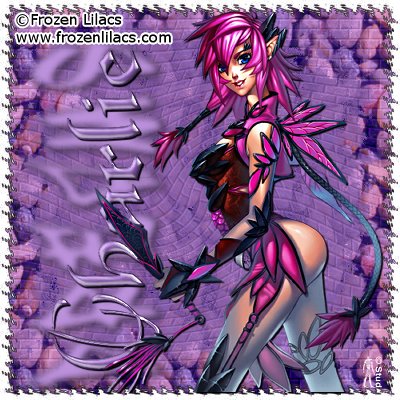
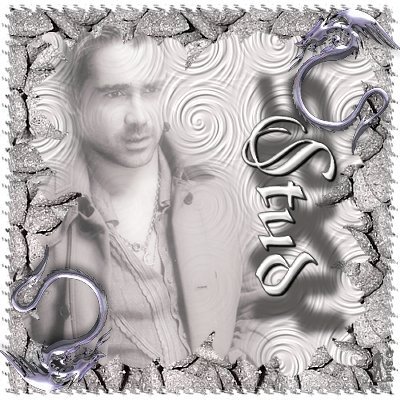
Graffitti with a Difference 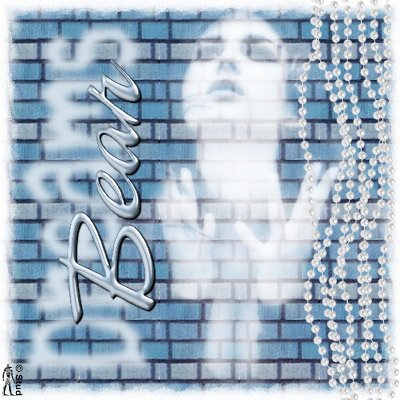 This tutorial is my own creation, any similarity is purely coincidental! This tutorial was written April 8th 2007. Please feel free to LINK to this tutorial and/or print it out for your personal use, but please do not copy it in anyway to put online, pass out or re-write without my permission Supplies PSP tube, accent(s) and 2 fonts of choice supplies include tube, brick pattern, mask, 2fonts and pearls accent HERE this is a simple tag with no outside filters unless you want to use some! This tut leaves the door open for you to use scrapbooking supplies, more than one mask, different patterns and effects... it's entirely up to you and your imagination! Steps that you can play on easily to make this your own are highlighted in purple! Good luck and have fun! This tutorial is my own creation, any similarity is purely coincidental! This tutorial was written April 8th 2007. Please feel free to LINK to this tutorial and/or print it out for your personal use, but please do not copy it in anyway to put online, pass out or re-write without my permission Supplies PSP tube, accent(s) and 2 fonts of choice supplies include tube, brick pattern, mask, 2fonts and pearls accent HERE this is a simple tag with no outside filters unless you want to use some! This tut leaves the door open for you to use scrapbooking supplies, more than one mask, different patterns and effects... it's entirely up to you and your imagination! Steps that you can play on easily to make this your own are highlighted in purple! Good luck and have fun! 1. Open a new, blank image 500 x 500 pixels transparent image (16 million color depth). File > New > set size & set color depth. 2. Flood fill this layer with white or pale color from your tube. 2a. Here you may add a texture to this layer, I've used the bricks, but any pattern may do! Settings of your own choice. Effects > Texture > texture > "your choice" 3. Add a new raster layer a flood fill with a pattern of your choice, I used the bricks pattern on the basic tag and other patterns for the embellished ones. 4. On your layer palette click on the word "normal and select "difference", this will change the look of the pattern. 4a. You can also play on this step, changing the selection will change your tag radically in some cases... scroll down to see the alternatives to check this out! 5. With the bricks layer highlighted, open your mask, Masks > new > from image and with invert mask data UNchecked select the mask from the list. Masks > delete > yes. 5a. Play with this step, depending on the mask you use will depend on whether you invert the data or not! 6. Open your tube, misted ones work really well but isn't necessary! Copy and paste as new layer and position as desired, this can be below the pattern layer if desired. 6a. On the layer palette you can change this tube to screen if desired, depending on your tube as some as so misted they're already at that stage! On my other unmisted alternative I changed it to hardlight. Play and see what you fancy best. 7. Merge > merge visible. 7a. You can use a filter to play with the edges of your tag at this point, I used Filters Unlimited (a pay filter) to give a fancy edge, but you can use another mask if you'd like, or leave it as it is! 8. Open your graffitti type font. For your background, choose a color that will stand out well on your background and with the foreground set to null, type in a short word eg "dreams" or "sexy" etc. Make sure that create as vector and antialias both checked. Resize and position as desired. Convert to raster layer when you're happy. 9. Effects > blur > gaussian blur with setting 5 10. Open your accent(s) and copy and paste as new layer, resize and position as desired 11. Open your normal font and change the foreground to a lighter color and with the same settings as you used for the step 8 add your name. Position slightly over the top of your graffitti and convert to raster layer as desired. 12. Add an inner bevel of your choice 12a. I also used Lokas Aqua Filter on some of them 13. Effects > 3D effects > drop shadow with settings: horizontal & vertical both ~ 2, opacity ~ 100, blur ~ 2, color black 14. Add a new raster layer for any copyright information and another for your own watermark. Resize as desired and save as jpeg. Below are some alternatives using various different patterns, masks, word art, effects and filters. | 
 Important Announcement