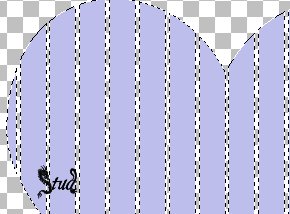
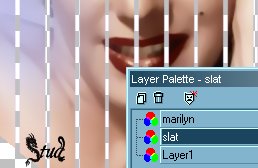
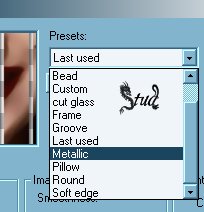
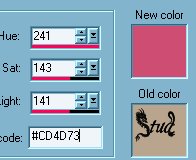
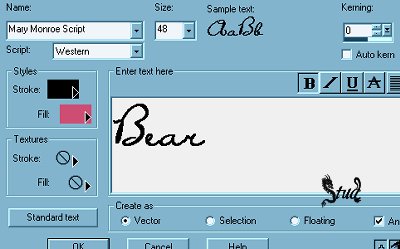
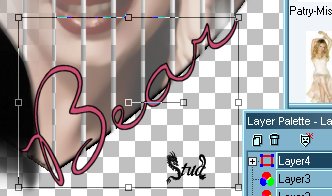
Heart of Marilyn  This tutorial is my own creation, any similarity is purely coincidental! This tutorial was written July 17th2005. Please feel free to LINK to this tutorial and/or print it out for your personal use, but please do not copy it in anyway to put online, pass out or re-write without my permission ©§tud Supplies PSP 2 different tubes of the same subject (it doesn't have to be the same subject... play away and see what comes of it!!) Fancy Script font Heart Slat, or another shaped slat if desired There are NO outside filters used in this tutorial My Supplies plus a few extra Marilyn tubes are here, scroll down halfway, click on the free download and scroll to the bottom of the screen, wait for the countdown to finish and then download the zip file containing the slat, tubes and font This tutorial is my own creation, any similarity is purely coincidental! This tutorial was written July 17th2005. Please feel free to LINK to this tutorial and/or print it out for your personal use, but please do not copy it in anyway to put online, pass out or re-write without my permission ©§tud Supplies PSP 2 different tubes of the same subject (it doesn't have to be the same subject... play away and see what comes of it!!) Fancy Script font Heart Slat, or another shaped slat if desired There are NO outside filters used in this tutorial My Supplies plus a few extra Marilyn tubes are here, scroll down halfway, click on the free download and scroll to the bottom of the screen, wait for the countdown to finish and then download the zip file containing the slat, tubes and font 1. Open a new, blank image 500 x 500 pixels transparent image (16 million color depth). File > New > set size & set color depth 2. Open the heart slat, copy and paste as new layer on the blank image and close the original, rename the layer "slat". Click on selections > select all > selections > float and you should have little marching ants around the sections of the slat. Click on selections > invert. 3. Open your choice of tube to go in the slat, copy and paste as new layer, rename the layer "marilyn", you'll see the marching ants moving over the tube also. Position the tube how you like it, it doesn't need to fill all the heart, but you can resize if desired! When you're happy with how it is positioned, make sure the marilyn layer is highlighted and press delete on your keyboard. Click back on selections > select none. 4. Highlight the slat layer and delete it to remove the blue background. Then click on Effects > 3D effects > drop shadow and use the followig settings: vertical ~ -2, horizontal ~ 2, Opacity ~ 60, blur ~ 4, color ~ black 5. Effects > 3D effects > inner bevel > metallic preset and use those settings. Go back to Effects > 3D effects > inner bevel and select the Bead preset from the list and use those settings 6. Open the 2nd tube of your choice, copy and paste it as a new layer, resize and reposition as desired. Move the heart slat about too if you want to. Add the same drop shadow settings as before. 7. Add a new raster layer for your watermark or brush. 8. Set your foreground to black and either choose a mid to pale color from your tubes or as Marilyn was fond of pink set the background to #CD4D73 9. Open your font and minimize it to your toolbar, add your text, size is dependent on the length of your text. Create as vector and antialias both checked and I used Mary Monroe font which is enclosed in my supplies link. 10. Resize and reposition as desired, when you're happy right click on the layer palette and convert to raster layer. 11. Add a new raster layer for any copyright information and/or artists terms needed and please make sure that it is legible when your tag has been resized. Resize so the longest edge is no more than 400 pixels. If in doubt, resize first and then add your © information. 12. Layers > Merge > merge visible and save as a jpeg. Here is a masculine version, using a different slat which I enlarged after copying onto the blank image. The font was Ministry Script, if you'd like this font please ask I'll send it to you! | 
 Important Announcement