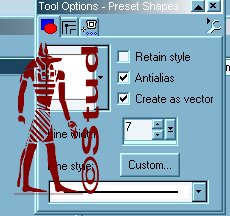
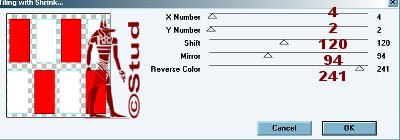
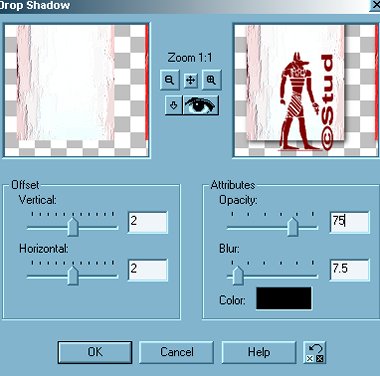
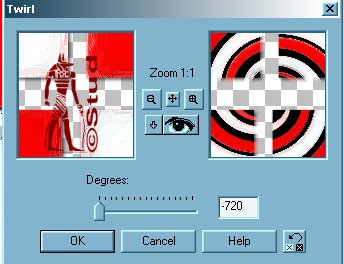
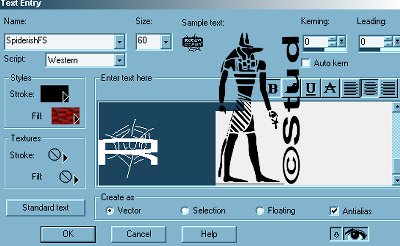
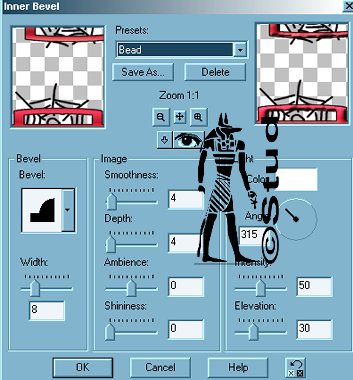
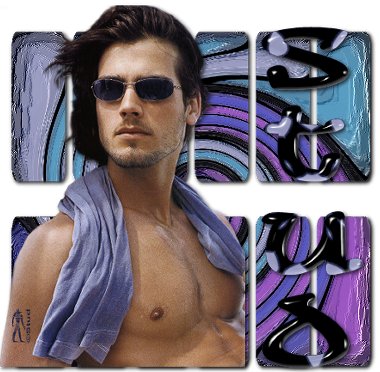
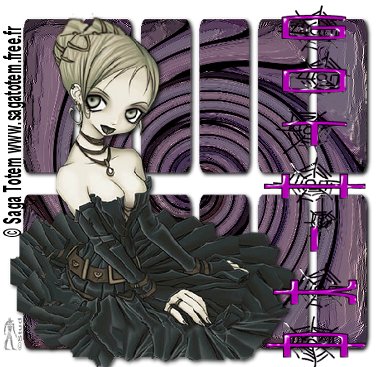
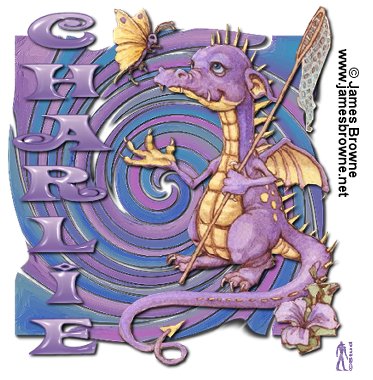
Hell Girl  This tutorial is my own creation, any similarity is purely coincidental! This tutorial was written September 25th 2005. Please feel free to LINK to this tutorial and/or print it out for your personal use, but please do not copy it in anyway to put online, pass out or re-write without my permission ©§tud Supplies PSP Font and Tube of choice (mine supplied) MuRa's Seamless Filter HERE Supplies This tutorial is my own creation, any similarity is purely coincidental! This tutorial was written September 25th 2005. Please feel free to LINK to this tutorial and/or print it out for your personal use, but please do not copy it in anyway to put online, pass out or re-write without my permission ©§tud Supplies PSP Font and Tube of choice (mine supplied) MuRa's Seamless Filter HERE Supplies 1. Open a new, blank image 500 x 500 pixels transparent image (16 million color depth). File > New > set size & set color depth 2. Open your tube and choose 2 colors (1 dark & 1 pale) from it. Select your preset shapes tool and choose the rectangle with the line width set to 7 and antialias and create as a vector both checked. Draw a large square that covers most of the canvas, resize as desired and make sure it's in the center of the canvas, then convert to raster. 3. Effects > Plugin Filters > MuRa's Seamless > Tiling with Shrink - these settings are guide lines only - the reverse color slider changes the colors of the tiles so play til you find a combo you like! 4. Effects > Artistic Effects > Brush Strokes > Impasto default and then change those settings to: length ~ 14, Density ~ 51, Brush ~ 256, width ~ 6, Opacity ~ 25, softness ~ 80, Angle ~ 111. 5. Effects > 3D effects > Drop Shadow with settings: vertical & Horizontal ~ 2, opacity ~ 75, blur ~ 7.5, color ~ black. 6. Image > resize by 85% with all layers UNchecked and bicubic resample selected. 7. Selections > select all > Selections > float. Effects > geometric effects > twirl > degrees -720 (play with this as it's only a guideline) > selections > select none. If you omit this step you can get a cool shape when you twirl. See Charlie's version at the bottom. Use this step only if you want a straight edged background! 8. Copy and paste your tube as a new layer, resize and position as desired, then add the same drop shadow as before. 9. Open your font and minimize to your toolbar, the size of font is dependent on the length of your text... if there a large gaps between each letter reduce the number on the leading (top right corner of the text box) so it's a minus number and keep reducing until you're happy with the gap. 10. Effects > 3D effects > inner bevel > bead preset. 11. Add any copyright information and watermark then layers > merge > merge visible. Crop off any spare white canvas and resize so that the longest edge is no more than 400 pixels. Save as a JPEG and ya done! Hope you enjoyed this tut! Below is a couple of different versions, my own version I played with both the MuRa and Twirl settings! To get the color on the text I seleceted and floated it and put a kaleidoscope from the reflections effects! | 
 Important Announcement