MSN Home  |  My MSN  |  Hotmail
Sign in to Windows Live ID Web Search:   
go to MSNGroups 
Free Forum Hosting
 
Important Announcement Important Announcement
The MSN Groups service will close in February 2009. You can move your group to Multiply, MSN’s partner for online groups. Learn More
My Own PSP storeContains "mature" content, but not necessarily adult.[email protected] 
  
What's New
  
  ***NEW TUTORIALS***  
  **RULES & REGS**  
  ~~~~~~~~~~~~~  
  ***TUTORIAL PREVIEWS***  
  ^^^QUICKIE TUTS^^^  
  *^* DOWNLOADS *^*  
  ~~~~~~~~~~~~~  
  ~~Messages~~  
  General  
  ***§tuds Offers and request pages***  
  ~~~~~~~~~~~~~~~~~  
  **§tuds Shares Page**  
  ~~~~~~~~~~~~~~~~~  
  Tricks 'N' Tips  
  **Animation Shop Optimization settings  
  ~~~~~~~~~~~~~  
  Pictures  
  ~~~~~~~~~~  
    
  ~~~~~~~~~~~~~~~~~  
  ~~~~~~~~~~~~~~~~~  
  © Artist Information & Permissions  
  G.I.L.D., C.I.L.M, AMI & Sticker Chick artists  
  ~~~~~~~~~~~~~  
  Background Template  
  
  
  Tools  


Latex Fun Tutorial


This tutorial is my own creation, any similarity is purely coincidental!
 
This tutorial was written April 17th 2005. Please feel free to LINK to this tutorial and/or print it out for your personal use, but please do not copy it in anyway to put online, pass out or re-write without my permission
 
©§tud
 
Supplies Needed:
PSP ( i made this in 7)
A Movie Frame Mask
Pattern of your choice
Tube of your choice
Font of your choice ( I used Dark Crystal)
zip of supplies
 
I have included 3 different tubes and 2 patterns which I will show the results of below.  Extract them to the relevant folders.
 
 
1. Open a new, blank image 400 x 400 pixels transparent image (16 million color depth). File > New > set size & set color depth
 
2. Click on the paint pot and set the foreground to black (#000000) and ur background to to the pattern you are using.  Then right click on your image to fill it with the pattern, reduce the opacity of this layer to 70.
 
3. Right click on your palette and add a new raster layer, left click on your image to cover the pattern with the black.
 
4. Click on masks > load from disk > double click on the mask 35mm-x1-90.msk (or your own movie frame mask if you want to play). Then go back to masks > delete > yes (when prompted).
 
 
5. Click on your magic wand on the left side
of your screen and left click into one to the frame holes down each side of your picture.  Hold down your shift key on your keyboard and click into each of the other holes so that there are marching ants in each one.  Click into layer 1 and press delete on your keyboard.  The background color will disappear.
 
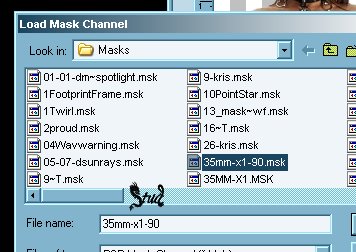
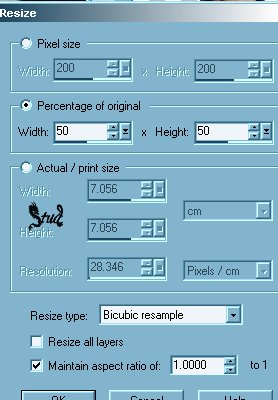
6.Open your tube, edit > copy.  Go back to your image edit > paste as new layer.  It will most likely be too big for your image so now is the time to resize it to your taste.  Click on Image > resize... depending on the tube you're using reduce the percentage down to a minimum of 50% and make sure that you have selected bicubic resample and unchecked resize all layers.  Your tube needs to almost fill one side of your frame.
  
 
7. If you're using a colored tube and want a black and white finish, now is the time to click on Colors > colorize and set both the Hue and Saturation to 0 and click ok.
 
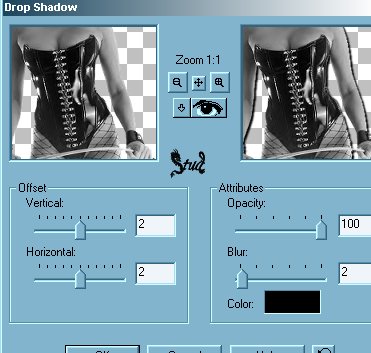
8. Add a shadow by clicking on effects > 3D effects > drop shadow >with the settings of:
Horizontal & Vertical ~ 2, Opacity ~ 100, blur ~ 2 and color set to black ~ #000000
 
 
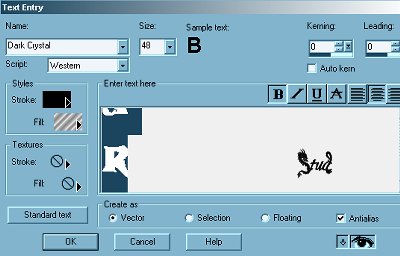
9. Open your font and minimize it out the way.  Click on the text button and click onto your image, insert your text, hitting return between each letter to type downwards.  Your stroke should be black and fill should be your pattern, font should be bold, create as vector and antialias both checked.  The size is variable depending on the length of your text.  Click OK and use move and resize to your satisfaction.  When you're happy, right click on the layer palette and convert to raster
 
 
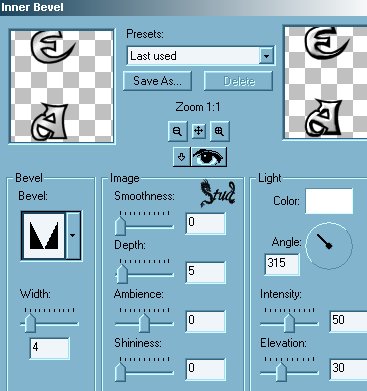
10. Add an inner bevel to your font, effects > 3D effects > inner bevel and select the groove preset with the settings:
width ~4, smoothness ~ 0, depth ~ 5, ambience and shininess both set to ~ 0, angle ~ 315 and color set to white ~ #FFFFFF, intensity ~ 50, elevation ~ 30.
Then add a drop shadow with the same settings as your tube.
Repeat this step if you are adding more text!
 
 
11. Add another layer for your watermark or brush if you're using one.
 
12.  Layers > merge > merge visible then save as jpeg and your're DONE!!
 
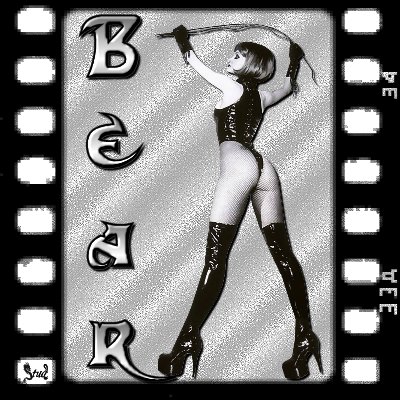
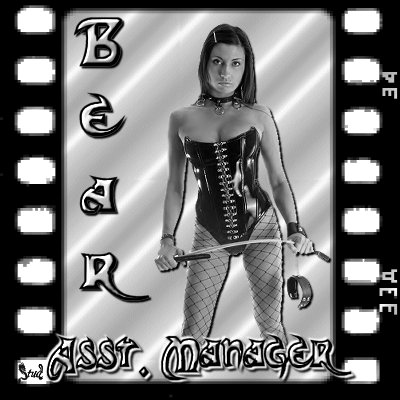
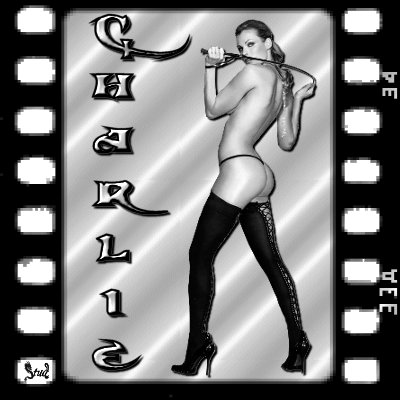
I hope you liked this tutorial and look forward to seeing your versions and results!  Below are a couple of different versions I made.


Webset created by §tud