This tutorial is my own creation, any similarity is purely coincidental! This tutorial was written April 24th 2005. Please feel free to LINK to this tutorial and/or print it out for your personal use, but please do not copy it in anyway to put online, pass out or re-write without my permission ©§tud Supplies Needed: PSP ( i made this in 7) A Background picture or artwork a tube of your choice Font of your choice 2 Gradients of your choice Eye Candy 4000 or 3.1 VM Instant Art always ensure you download any filters etc with PSP closed Supplies HERE
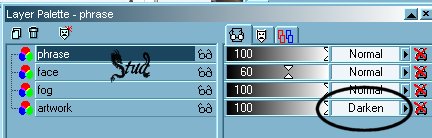
1. Open your artwork or background of your choice, press Ctrl + D on your keyboard to create a copy then close the original. Right click on the layer palette and promote to layer. Click on the arrow on the far right of the layer and change to darken.
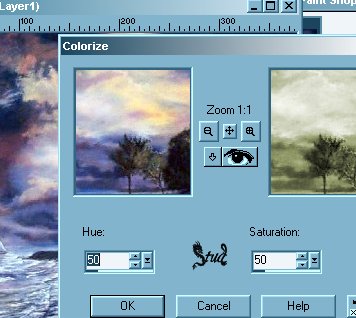
2. Click on Colors > Colorize and set the Hue and Saturation both to 50. Right click on the Layer palette and duplicate this layer.
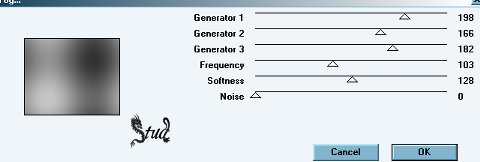
3. Make sure the duplicated layer is highlighted then click on Effects > Plugin Filters > VM Instant Art and select "Fog" and use the following settings:
generator 1: 198
generator 2: 166
generator 3: 182
Frequency: 103
Softness: 128
Noise: 0
4. Open the face tube, or the tube of your choice, copy and paste as new layer on top of your tag. Click on Image > resize > 70%, bicubic resample checked and all layers UNchecked.
5. Click on Image > mirror, then Colors > colorize and use the same settings as before. The face i have is using a mask, so at this point go to masks > delete and select yes when prompted, then reduce the opacity on the layer palette to 60.
page 2 
 Important Announcement