This tutorial is my own creation, any similarity is purely coincidental! This tutorial was written September 30th 2007. Please feel free to LINK to this tutorial and/or print it out for your personal use, but please do not copy it in anyway to put online, pass out or re-write without my permission ©§tud Supplies Needed PSP
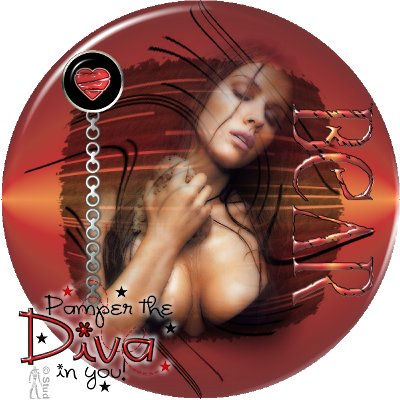
Tube of choice - works best with a misted tube but doesn't necessarily need to be one!
font of choice - I used Magna Veritas
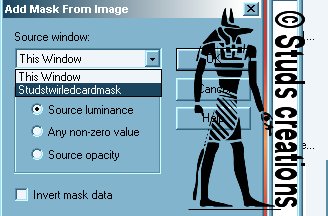
Mask of choice
Gradient of choice
accents/word art of choice
Lokas Plugin - Gel Filter HERE Supplied: Mask, tube, font, gradient, accents, word art, inner bevel HERE unzip the 10e BM bevel preset to your preset folder and the SN_Eternal Flame gradient to your gradient folder 1. Open a new, blank image 600 x 600 pixels transparent image (16 million color depth). File > New > set size & set color depth
2. Flood fill with black, add a new raster layer and flood fill the second layer with your gradient
3. Open your mask - if you're using the supplied masks, open Studstwirledcardmask - Masks > New > From Image > select your mask name and with invert mask data UNchecked click ok. Masks > delete > yes
4. Merge > Merge visible
5. Effects > Geometric Effects > Circle
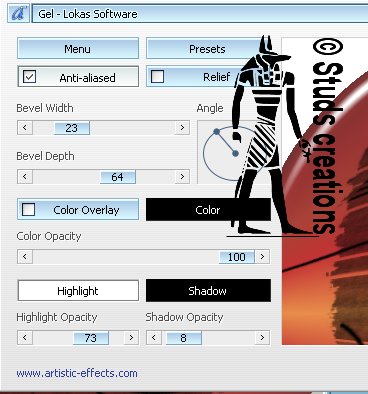
6. Effects > Plugins > Lokas > Gel, keep the default settings but slide the bevel width along to 23
7. Open your tube, copy and paste as new layer, resize and position as desired
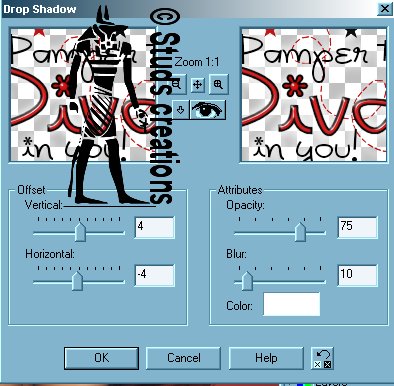
8. Add your accents and word art, I put a white drop shadow around my word art - effects > 3D effects > drop shadow with settings: vertical ~ 4, horizontal ~ -4, opacity ~ 75, blur ~ 10, color ~ white. Repeat the drop shadow, changing the vertical to -4 and the horizontal to 4.
9. Open your font and with create as vector and antialias both checked add your text, resize and position as desired
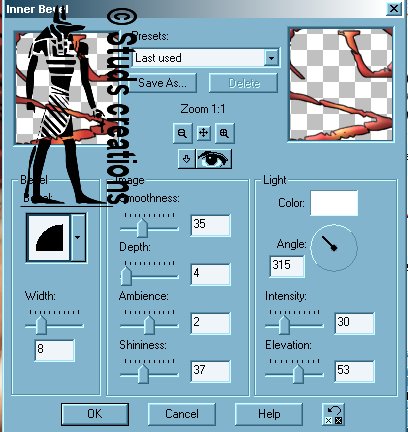
10. Effects > 3D effects > Inner Bevel - of your own choice, I used the supplied 10eBM default settings. I also re-used the Gel filter and slid back the bevel width to 11
11. Add any copyright information on another raster layer and add another layer for your own watermark
12. Resize if desired and save as jpeg.
Alternative versions I inverted the mask data to get a dark background 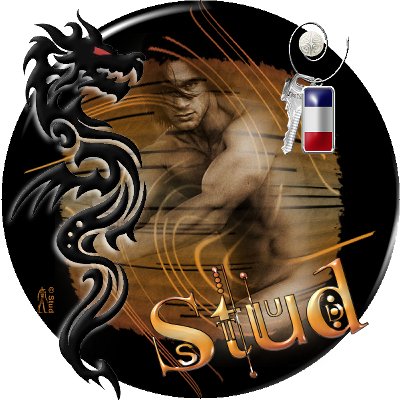 I used the alternative mask I supplied, no misted tube and an extra flower tube that i reduced the opacity on.
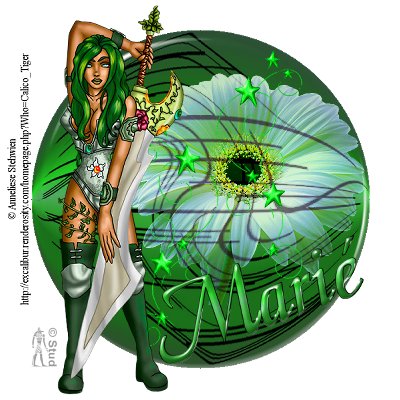

 Important Announcement