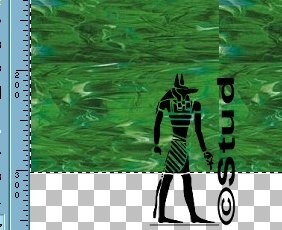
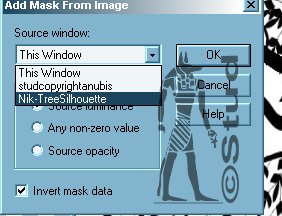
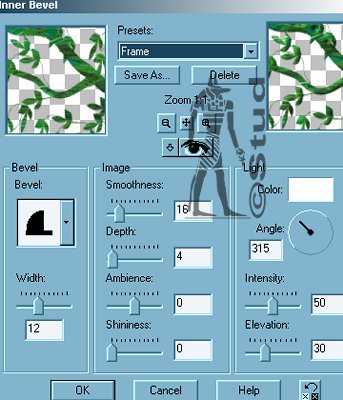
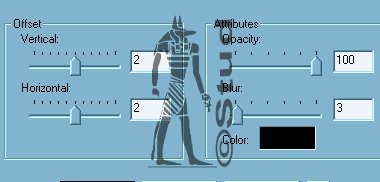
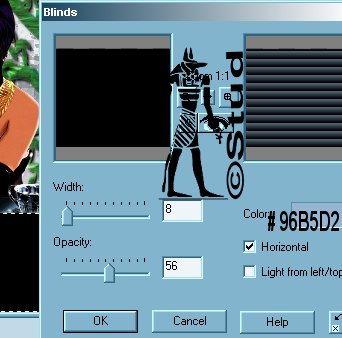
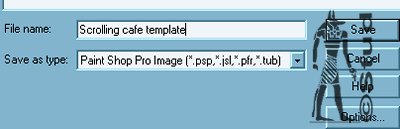
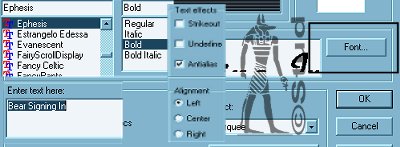
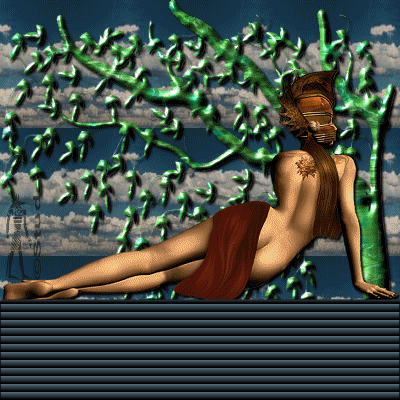
Scrolling Cafe Sign In Tag 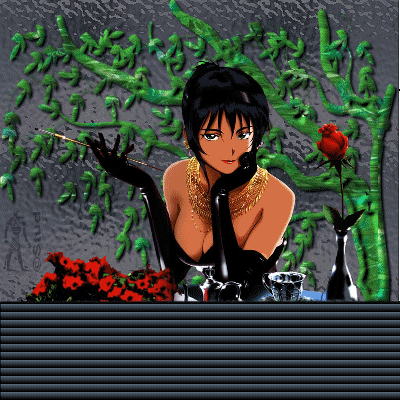 This tutorial is my own creation, any similarity is purely coincidental! This tutorial was written August 7th 2005. Please feel free to LINK to this tutorial and/or print it out for your personal use, but please do not copy it in anyway to put online, pass out or re-write without my permission ©§tud Supplies PSP A tube of your choice 2 different patterns/gradients or colors JASC Animation Shop Tree mask Supplies include the mask and the tube I used HERE There are no outside filters in this tutorial. This tutorial is my own creation, any similarity is purely coincidental! This tutorial was written August 7th 2005. Please feel free to LINK to this tutorial and/or print it out for your personal use, but please do not copy it in anyway to put online, pass out or re-write without my permission ©§tud Supplies PSP A tube of your choice 2 different patterns/gradients or colors JASC Animation Shop Tree mask Supplies include the mask and the tube I used HERE There are no outside filters in this tutorial. 1. Open a new, blank image 400 x 400 pixels transparent image (16 million color depth). File > New > set size & set color depth 2. Click on the selection tool and with the feather set to 0, antialias checked and rectangle selected, draw a box from around the 300 pixel mark upwards to cover the top 3/4 of the canvas. Add a new raster layer and with that layer highlighted, select the paler of the 2 patterns or gradients and flood fill this selection. Reduce the opacity to approx 50 depending on how pale your choice is. 3. Keep this selected and add a new raster layer, again with that layer highlighted, select the darker pattern or gradient and flood fill that layer. I used a dark green as my 2nd choice but it's all up to you!! Keep this selected. 4. Open the tree mask and minimize it. Make sure the main canvas is active and click on Masks > new > from Image > select the tree from the list. Masks > delete > yes. Selections > select none. 5. Make sure the darker layer is highlighted (which is now a tree) and click on Effects > 3D effects > inner bevel... I used the frame default setting but choose whichever you prefer! The object is to make the tree look more realistic! 6. Effects > 3D effects > drop shadow settings Vertical & horizontal both ~ 2, Opacity ~ 100, Blur ~ 3, color ~ black. 7. Open your tube, copy and paste as new layer, resize as desired... if you're using my one I resized by 50% and positioned on the edge of the selection. 8. Add a new raster layer and with the selection tool, select the bottom quarter of the canvas, select slightly over the top of the top layers to give it a clean edge. Then flood fill this with black. 9. Keep this selected and click on Effects > 3D effects > texture effects with the settings: width ~ 8, Opacity ~ 56, color ~ #96B5D2, horizontal checked and light UNchecked. Selections > select none. Layers > Merge > merge visible. Save the tag as a psp image 10. Open JASC Animation Shop (AS) and open the image. I you have many frames already you've forgotten to merge your layers. Simply close it in AS and reopen in PSP, merge the layers and then reopen it in AS! 11. Click on effects > insert text effects. Click on the Font button on the right side and select a nice font with any setting you fancy! I used size 36 for my font as it fitted the bar perfectly. Type in your text in the box that says Enter text here: I've copied all the useful boxes onto one picture to make it easy to see. You may find the scrolling text is moving too high up on the tag, this easily remedied. Make sure you have the Marquee selected then click on Customize. Make sure that you have preview checked! Make sure center text is UNchecked. The higher the number the lower the text is on your tag... 318 works for my font but play about until you're happy! 12. Click on File > Optimization Wizard and follow the steps. Animated Gif file and replace the currant animation both checked the rest UNchecked, click next > Better Image quality should be selected by moving the slider up to the top,click next > click Next again > and Next again > then Finish. Save the picture as a gif and ya done!! Hope you enjoyed the tutorial | 
 Important Announcement