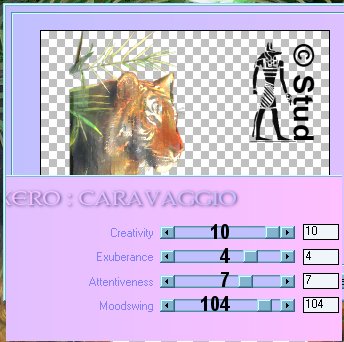
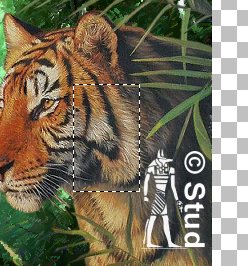
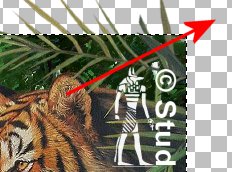
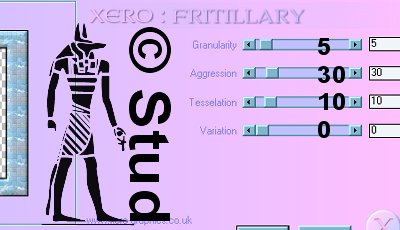
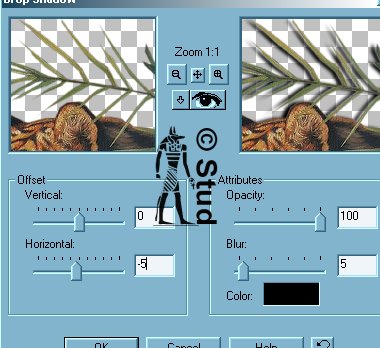
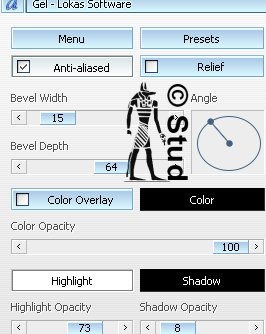
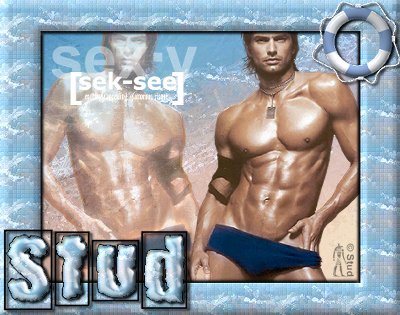
Xero Tolerance  This tutorial was written February 24th 2007. Please feel free to LINK to this tutorial and/or print it out for your personal use, but please do not copy it in anyway to put online, pass out or re-write without my permission Supplies Background picture of choice tube, font and accents of choice Plugin Xero HERE download all 4! Plugin Lokas Gel (optional) HERE my supplies HERE including jungle background, David Stribbling tube (include the © if you use this), the pawprint font. This tutorial was written February 24th 2007. Please feel free to LINK to this tutorial and/or print it out for your personal use, but please do not copy it in anyway to put online, pass out or re-write without my permission Supplies Background picture of choice tube, font and accents of choice Plugin Xero HERE download all 4! Plugin Lokas Gel (optional) HERE my supplies HERE including jungle background, David Stribbling tube (include the © if you use this), the pawprint font. 1. Open your background picture, copy and paste it as new image then close the original. 2. Right click on the background layer and convert to raster. Image > resize > 80%, make sure that resize all layers is UNchecked, OK. 3. Effects > Plugins > Xero > Artworx with settings: brush ~ wedges, stroke ~ 18, Density ~ 21, Cohesion ~ 10, Angle ~ 600, Twirl ~ 10, jiggle ~ 3, spikes ~ 3, Varience ~ 10, preserve details ~ 187, overall strength ~ 255. 4. Open your tube, copy and paste as new layer and resize and position as desired. Click on this layer and duplicate it. Highlight the copy > Image > mirror and drag below the original. Keep this layer highlighted. 5. Effects > Plugins > Xero > Caravaggio with settings: creativity ~ 10, Exuberance ~ 4, Attentiveness ~ 7, Moodswing ~ 104. Reduce the opacity to approx 63 depending on the tube. 6. Click on the selection tool with rectangle selected. Select an area from either your tube or background to use as a frame pattern. Make sure it's not too close to the edge. Selections > convert to seamless layer (if your selection is too close you will get a message box pop up... if you do, deselect and try on a different place). 7. Highlight layer 1, click on the wand and then click into the space around the edge of your background. 7b (optional). this step is dependent on your tube, if you have pieces that stick out over the edge of the frame, like the tiger above, follow this step. Highlight your copied layer of your tube and hit delete on your keyboard. Keep your frame section selected. 8. Highlight the copied layer on your layer palette and add a new layer. Change your background color to the pattern you created earlier and flood fill the selected area. Keep selected. 9. Effects > 3D effects > Inner bevel > 10eBM default settings (or use your prefered bevel) 9b.(optional) at this point you can add another Xero filter to the frame. Effects > Plugins > Xero > Fritillary with the following settings: Granularity ~ 5, Aggression ~ 30, Tesselation ~ 10, Variation ~ 0. See the alternative at bottom for this version. 10. Highlight the original tube layer and add drop shadow. Effects > 3D effects > drop shadow with setings: vertical ~ 0, horizontal ~ -5, opacity ~ 100, blur ~ 5, color ~ 5. 11. Add a new raster layer and add any © information for your tube and add another raster layer for your own watermark. Open your font and minimize it to your toolbar. 12. Add your text with antialias and create as vector both checked. Resize and position as desired. Convert to raster layer when happy with it. 13. Effects > 3D effects > inner bevel with same settings as step 9. 14. (optional) Effects > Plugins > Lokas Gel with default settings. 15. Add any accents you wish. Resize as desired and save as Jpeg. this has the fritillary plugin on the frame, some word art and accent. | 
 Important Announcement