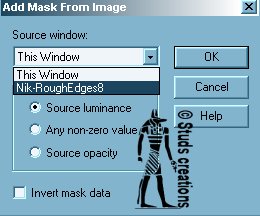
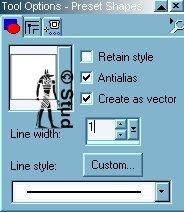
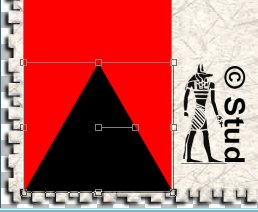
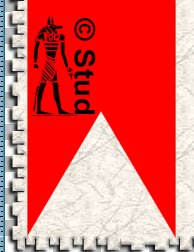
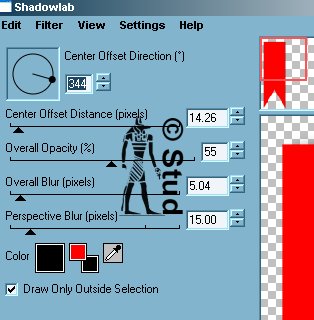
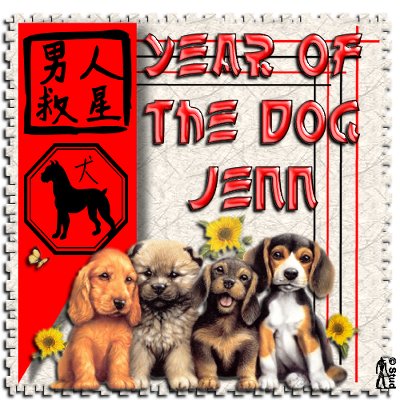
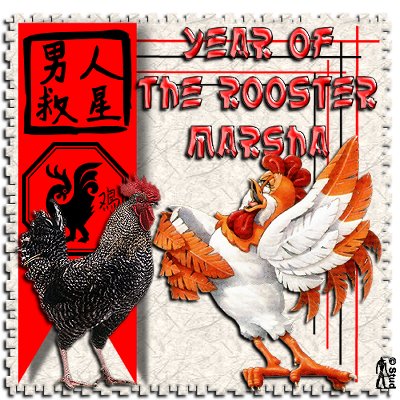
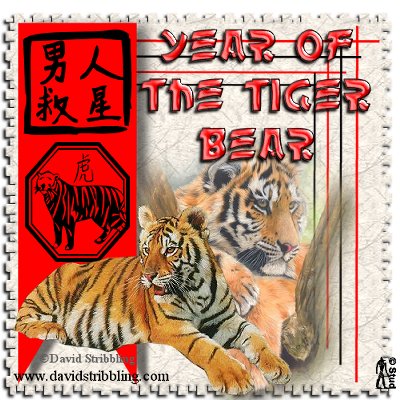
Year of the Pig  This tutorial was written February 3rd 2007. Please feel free to LINK to this tutorial and/or print it out for your personal use, but please do not copy it in anyway to put online, pass out or re-write without my permission Supplies animal tubes and font of choice Plugin Eyecandy 4000 shadowlab (this is not free and you can use normal drop shadow or Eye Candy 3 instead) Plugin Lokas Aqua (optional) HERE included in my supplies: Chinyen font Chinese Zodiac ding font Chinese whisper ding font oriental background zodiac lines mask a list of years and corresponding animals HERE This tutorial was written February 3rd 2007. Please feel free to LINK to this tutorial and/or print it out for your personal use, but please do not copy it in anyway to put online, pass out or re-write without my permission Supplies animal tubes and font of choice Plugin Eyecandy 4000 shadowlab (this is not free and you can use normal drop shadow or Eye Candy 3 instead) Plugin Lokas Aqua (optional) HERE included in my supplies: Chinyen font Chinese Zodiac ding font Chinese whisper ding font oriental background zodiac lines mask a list of years and corresponding animals HERE 1. Open the oriental background, copy and paste as new image then close the original. 2. Open the mask and minimize. Masks > New > From Image, select the Nik-roughedges8 and make sure the invert mask data is UNchecked. Masks > delete > yes. 3. Select red #FF0000 as your background color and null your foreground. 4. Click on your preset shapes and select the rectangle with antialias and create as vector both checked. Draw a long rectangle down the left side of background. Resize and postions as desired and convert to raster layer. 5. Change the color to black and the preset shape to triangle, again with antialias and create as vector both checked. click near the bottom of the red bar and drag down and to the right, make sure the bottom points touch the bottom points of the red bar. When happy with size and position convert to raster layer. 6. Make sure layer 2 is highlighted, selections > select all > selections > float. Click on layer 1 and hit the delete key on your keyboard. Delete layer 2 (the triangle) so you are left with a ribbon shape 7. Open the Chinese Whisper font, select any letter with the background still black and foreground still null and with antialias and ceate as vector both checked. Resize and postion at the top of the ribbon, convert to raster layer. 8. Open the zodiac lines, copy and paste as new layer drag down below layer 1. 9. Open the Chinese zodiac font and select the animal year you require, all the letters are lower case: e=dragon, i=monkey, a=rat, d=rabbit, f=snake, g=horse, j=rooster, k=dog, l=pig, c=tiger, b=buffalo, h=goat. With anitalias and create as vector both checked, resize and position below the chinese stamp and convert to raster. 10. Click on layer 1 (the ribbon), effects > plugins > Eye Candy 4000 > shadowlab with settings: distance ~ 344, distance ~ 14.26, opacity ~ 55, overall blur ~ 5.04, perspective blur ~ 15.00 and draw only outside selection checked. 11. Open your animal tubes and copy and paste as new layers, resize and position as desired. Effects > 3D effects > drop shadow with settings: vertical ~ 3, horizontal ~ -3, opacity ~ 100, blur ~ 5, color ~ black. Add to all the tubes. 12. Click on the background layer and add the same drop shadow. 13. Change the foreground color to black and the background color to red #FF0000 and add your text - Year of the <insert animal> add the name/nick - with antialias and create as vector both checked. I used the Chinyen font at size 28. Resize and postion as desired, convert to raster layer. 14. Effects > 3D effects > inner bevel (any bevel you like) 15. Effects > plugins > Lokas > Aqua default settings (this step is optional) 16. Add the same drop shadow as the tubes. Add any copyright as a new layer and another for your watermark. Resize if necessary and save as a Jpeg. Below is a few other animal versions | 
 Important Announcement