| Making double Verticles in Backgrounds.
1. Make yourself a five layer C/S, do not "Send Message"
2. Place your cursor in the last layer you have made, then
go to the top of the page and clic on Center Justify.....you
will notice that your cursor is now in the centre of your last Layer.
3. Go to Insert Table and do your rows and columns, as usual, as if you were going to make another Layer .. then go to HTML box and tic it...
4. Look carefully at this next part please, for this is what you will have to add to obtain the vertical bars .......I will have to type them out .... 5. Copy this layer for layer... <TD> Align Middle
<TABLE class=NOBORDER borderColor=#cc9933 cellSpacing=0 cellPadding=0 width="97%" bgColor=#3399cc background="" border=0>
<TBODY>
<TR>
<TD>Align Middle
<TABLE class=NOBORDER borderColor=#cc9933 cellSpacing=0 cellPadding=0 width="98%" bgColor=#ffffff background="" border=0>
<TBODY>
<TR>
<TD>AlignMiddle><BR>
<TABLE class=NOBORDER borderColor=#cc9933 cellSpacing=0 cellPadding=0 width="97%" bgColor=#3399cc background="" border=0>
<TBODY>
<TR>
<TD>AlignMiddle
<TABLE class=NOBORDER borderColor=#cc9933 cellSpacing=0 cellPadding=10 width="98%" bgColor=#ffffff background="" border=0> 6. Be mindful of course about your spaces ...and remember to delete them as you go ....
7. Notice I have used widths of 97% and 98% .....these we can play around with, depending on the desired effects you want.....it pays to play around a little . I have also added a colour so that it will be easier for you to notify what you have done. Because there has been some difficulty in getting these correct ...I have made a little alteration to this Tutorial ... This is a Screen Print of how your finished product should look before clicking on Send Message ..... 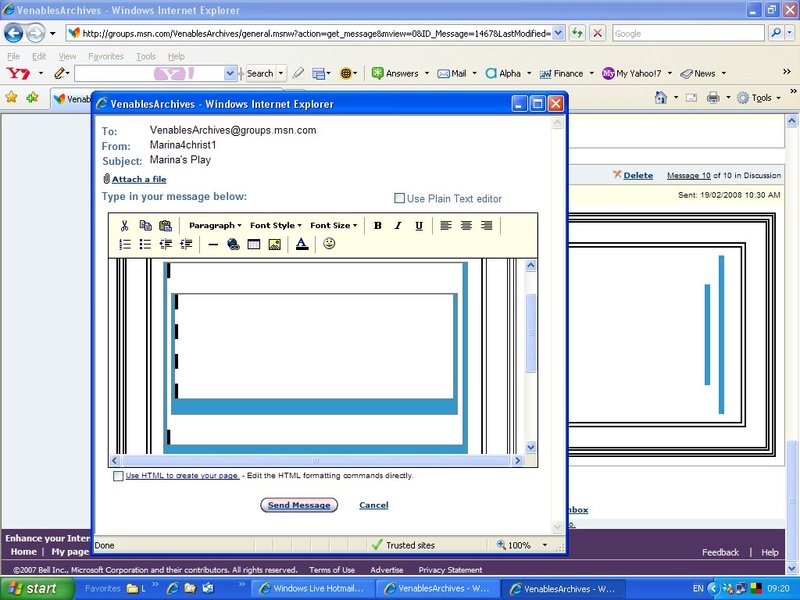
Do you see the darker dashes in between the verticle lines ..
this is where you will have to hit your enter key, so placing your curser inside the two blue horizontal lines hit your enter key once only, then above the second horizontal line about four times, this avoids the narrow C/S when you clic on Send Message. Everything highlighted in the previous notes are what have to be added to your layers ...... Have fun .......and if you got any questions holler ......ok?? Any resemblance to any other tutorial of this kind, is purely coincidental. Designed & HTML & © by Marina @ VenablesArchives. | 
 Important Announcement

 First
First 