 | Print template of choice and color as necessary
|
| Cut out the template pieces.
|
| Fold each piece in half (on the dashed line) so they are all colored on both the front and the back.
|
| Optional: Put thin cardboard in between the front and back of each template piece to make them a bit sturdier.
|
| Glue together so the pieces are colored on both sides.
|
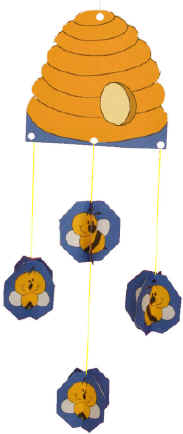
| 3D Bumblebees:  | Cut on one of the dotted lines of each template piece (only cut as far as the dotted line goes, not all the way through the piece).
| | Slide the pieces together, top to bottom  | | Glue a piece of ribbon, string or thread onto the top (or hole punch a small hole and tie a ribbon through). If you hole punch, do it through the bee that is cut from the bottom, not the one that is cut from the top.
| |
| Beehive: | punch three holes in the bottom of the beehive template (one in the center and one on each edge)
| | string one bumblebee through each of the holes so it hangs down from the hive
| | punch a hole in the bottom of the middle bumblebee and string the fourth bumblebee through that hole
| |
| Optional: | print as many copies of template 3 as you like and keep adding bumblebees to the bottom of the other bumblebees and the hive to make a very busy beehive!
| | 'numbers practice' -- count the bees
| | 'colors practice' -- color the background of each bee a different color. | |

 Important Announcement

 First
First 