MAKING A 3 LAYER BACKGROUND
Step #1
To begin, you will need to have 3 internet windows open.
#1- This window here with the instructions
and the template.
#2- The place where your background tiles are stored online or other tiles off the web.
#3- The practice board where you will make your background HERE.
Step #2
Once you have these 3 windows open, copy the blank template above.
Step #3
Now open window number three ... the practice board. Paste the temple in your post.
Step #4-
ASSEMBLING YOUR BACKGROUND. Open window number 2 - Your background Tiles. The main focus here is to choose tiles that color coordinate with each other. Copy the URL to the tile you wnat to use first.
Step #5-
Go back to your practice post. Click inside the first layer of the practice template (the outer layer).
Now click on the table icon 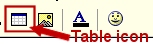 . The table box will pop up, click on the "Edit Table" tab and then click on "Background". This is where you are going to paste your background URL that you just copied. Place your cursor in the URL box (if there is anything typed in the box, delet it and then hit "CTRL+V" to paste your Url in it. Click on the "Update Table" button, located at the bottom. You will now see your background tile in the first layer.
Step #6
Now we are going to go back and choose our second layer background. Choose one that goes well with your first layer background tile. Once you have chosen your tile, repeat step Step #5.
You should now see your second layer tile in place.
Step #7
Now for our third and final layer (top layer)
For now, Let's make this layer white. Later we can make it another color or use a solid textured background from the tiles albums. This is the layer that you will be posting your message on, so we always want to keep this one a solid color so your text will show up well on the background.
On your practice thread background, place your cursor inside of layer three (the top layer). Click on the "Table icon" again. Then click on "Edit Table". Then on "Backgrounds"...just like we did before, except this time, place your cursor inside of the "Background Color" box. Type in #FFFFFF (white) then click on the "Insert Table" button. Now your background will be white.
You're done! You should now have your own background!

 Important Announcement

 First
First 