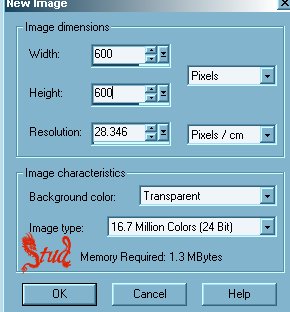
1. Open a new, blank image 600 x 600 pixels transparent image (16 million color depth). File > New > set size & set color depth... we will resize at the end so don't worry that the canvas is too big!
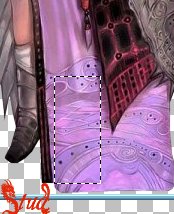
2. Open your tube, make a copy and close the original. Use the selection tool (the rectangle shaped dotted line near the top of your tool bar) and with the rectangle preset, select a colorful portion of the tube to use as a background. Click Edit > copy > Edit > paste as new image and then minimize this new image.
GO back to the tube and click selections > select none... then minimize this too.
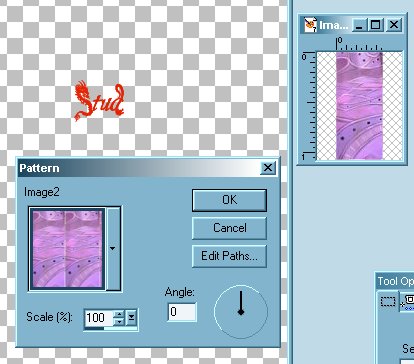
3. Click on the paint pot to fill your blank image. On your color palette select your background to be the image you've just made, scale 100%, angle 0, then right click in the middle of your
blank image.
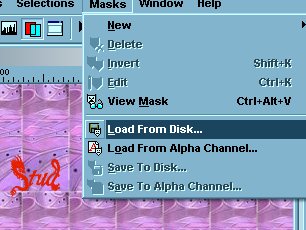
4. Open your mask, Masks > load from disk > select the bice_rswing.msk from your list and most of the patern should disappear behind the mask and you should be left with a ribbon
around the edge. Masks > delete mask > click yes when it asks if you want to merge the layer
5. Click on Effects > 3D effects > Inner bevel with the following settings: Metallic preset
width ~ 3
smoothness ~ 10
Depth ~ 11
Ambience ~ 0
Shininess ~ 96
color set to white ~ #FFFFFF
angle ~ 315
Intensity ~ 28
Elevation ~ 29
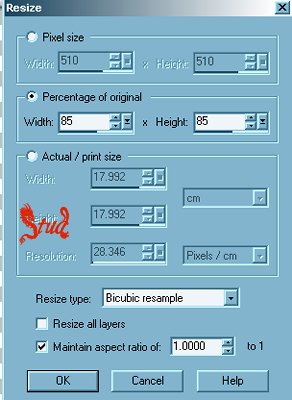
6. Resize by 85%, bicubic resample selected, resize all layers UNchecked and maintain aspect ratio checked, Click on Edit/Repeat Resize and it leaves all the settings the same as you just did.)
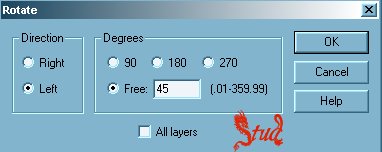
7. Duplicate your ribbon and with the copy highlighted click on image > rotate > free checked > 45 degrees... it doesn't matter
which direction!
8. Merge your 2 ribbon layers... Layers > Merge > merge visible
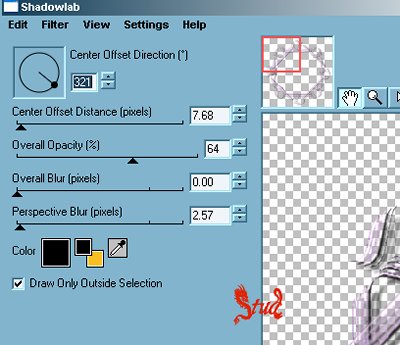
9a. If you're have Eye Candy 4000 (no Eye Candy 4000 go to step 9b) use the following settings:
Effects > Plugins > Eye Candy 4000 > Shadowlab > short
perspective shadow (from settings list)
Center offset direction ~ 321
Center offset Distance ~ 7.68
Overall Opacity ~ 64
Overall blur ~ 0.00
Perspective blur ~ 2.57
Color set to black ~ #000000
draw only outside selection ~ checked
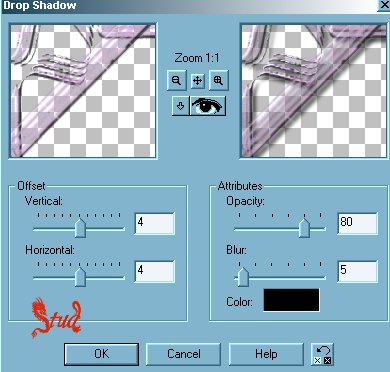
9b. If you don't have EC4000 then the normal drop shadow will work just as well with these settings:
vertical ~ 4
horizontal ~ 4
opacity ~ 80
blur ~ 5
color set to black ~ #000000
10. Maximize your tube, copy and paste as a new layer, then resize by 75% with the remaining settings the same as before,
all layers UNchecked, bicubic resample selected and maintain aspect checked... then position to suit your tag

 Important Announcement