Heart and Soul Tut:
All of the these tutorials were created by me, using Paint Shop Pro and outside filters. All ideas are copyrighted to me as these are my own original designs. Any similarity to another tutorial is coincidental. Please do not post them on another site, rewrite or claim them as yours.
This is what we are making:
yoou need these supplies:
Let's get started:
open all supplies in PSP (you do not have to open the finished tag) I just included it as refernece
Open a new file 600 x 400 transparent bkg
fill with back
copy the misted image and place in the middle of the new file
copy the 3 diamond hearts and place to the left as new layer
open the C1 and place on the left side of your misted tube as new layer
dulpicate the C1 and move to the right side of the misted tube
go to layers and merge all flat
add a boarder of 5 pixles white and select with the magic wand
fill with the Zilver gradient, leave selected and go to adjust (brightness and contrast) use the setting
Brightness -139 contrast 0
select none
add another border 10 pixels with white and select with the magic wand
fill with the Zilver gradient again
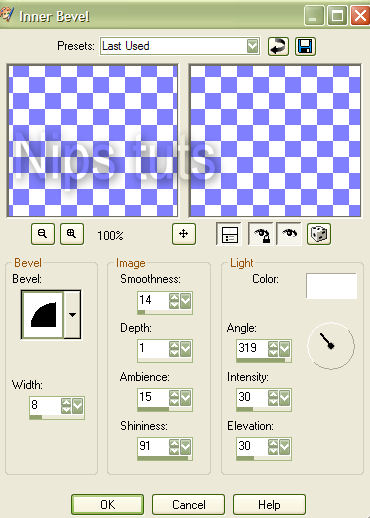
go to effects--inner bevel and use these settings
select none
resize if you want
add any text that you want and your are finished
Nip

 Important Announcement

 First
First 