The use of the Model of 1907 sling.
(a.) Place the rifle butt on your right hip and cradle the rifle on the inside of your right forearm, sights to the right (Figure 1).
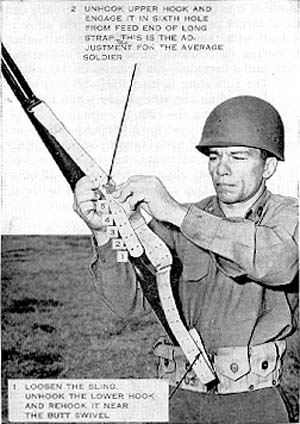
Figure 1
Both of your hands are now free to adjust the sling. Loosen the sling, then unhook the lower hook and rehook it down near the butt swivel (Figure 1, note 1).
(b.) The loop to be placed on your arm is formed by that part of the long strap between the D-ring and the lower keeper. For the average sling adjustment, unhook the upper hook and engage it four to six holes from the end of the long strap (Figure 1, note 2). To shorten or lengthen the sling to conform with your body and arms, make the adjustment by moving the upper hook. Push the lower keeper up (Figure 2, note 3); the loop now formed is the loop for your left arm (Figure 2, note 4).
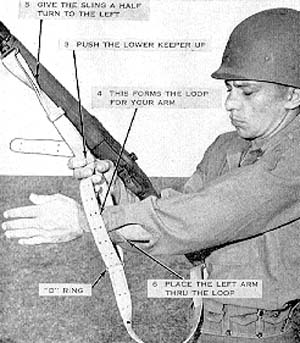
Figure 2
Straighten out the sling so that it lies flat, then give it a half turn to the left (Figure 2, note 5). Insert your left arm through the loop until the loop is high on the upper arm, above the biceps (Figure 2, note 6). Now, using both hands, left hand on the outside strap, right hand on the inside, rotate the sling through the upper swivel, moving the lower keeper and upper hook downward to your arm (Figure 3, note 7).
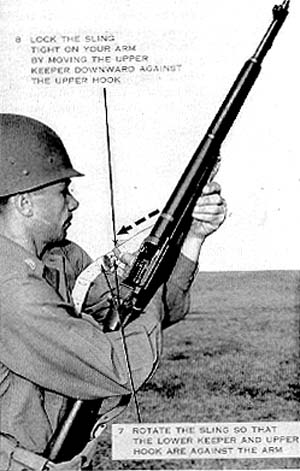
Figure 3
This tightens the loop on your arm. Now, to keep the loop from slipping, pull the upper keeper down tight against the upper hook, locking it in place (Figure 3, note 8). The feed end of the sling is left hanging downward. Do not roll it up between the keepers as this will stretch them.
(c.) For the average soldier, the adjustment of the loop sling in the kneeling, squatting, and sitting positions is about two holes shorter than that for the prone position.
(d.) After the sling has been adusted on the upper arm, grasp the rifle so that the hand is against the stock ferrule swivel (Figure 4, note 9) and the sling lies flat against the back of the left hand (Figure 4, note 10).
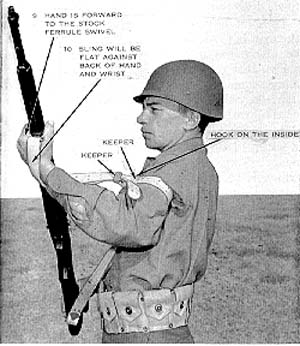
Figure 4
(e.) Before taking your position, place your left hand so that the rifle lies in the center of the V formed by your thumb and first finger.
(f.) Some leeway in the position of the loop on the arm is permitted. In general, the loop should be above the biceps; however, experience has shown that many men get good results with the sling somewhat lower. It is important that daylight be visible between the sling and the crook of the arm formed at the elbow.
(g.) Be sure the sling is doing its share of the work in giving your rifle full support. The tendency of most men is to use a sling adjustment which is too long (loose). A properly adujsted sling means a steady rifle (Figure 5).
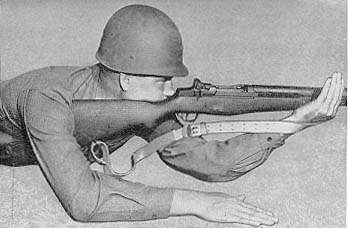
Figure 5: A Properly Adjusted Sling!
Simple, isn't it?

 Important Announcement
