| 1. Click on Pictures on the left sidebar. This opens the screen to the right. 2. Click on Create a new album (see red arrow at right). The window below will open. | 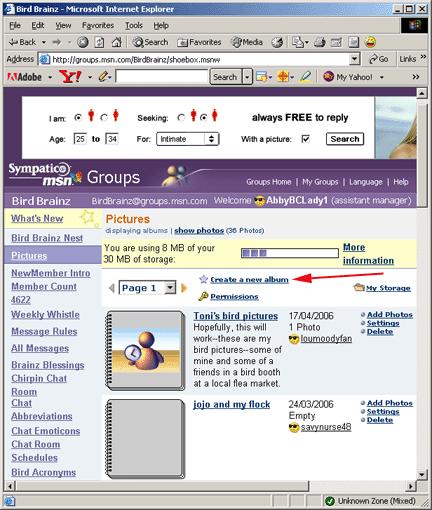 |
| 2. Click on Create a new album (see red arrow above). The window at right will open. 3. Type in the name of your album in (A) above. 4. Type a description if you wish in (B) above. | 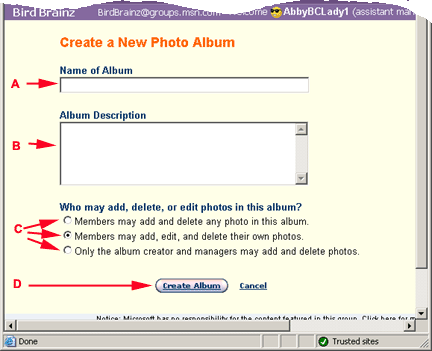 |
| | 5. Select who may add delete or edit photos in your album in (C) above. 6. When you have completed steps 3, 4 and 5, click on Create Album button (D) above. |
| | As you can see, I named my album Testing for this purpose. Now that you have created an album, you can add some photos. |
| 1. Click on (see red arrow in picture below). The screen below will open. | 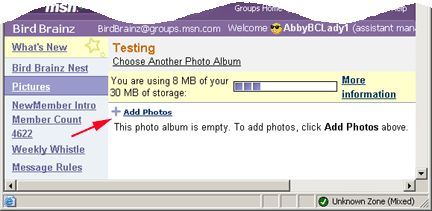 |
| 2. In the right column under the down arrow, go to the area on your computer where you have your pictures stored. When I'm going to upload pictures into my album, I put them in a folder on my desktop to make it easier. Here, I have selected Easter gifs. | 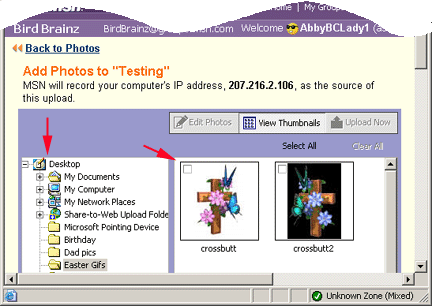 |
| | 3. All pictures in the folder Easter Gifs are displayed on the right of the screen. Click in the box on the top right corner of each picture that you wish to place in your album. |
| 4. You will see that the Upload Now button (see red arrow below) is no longer greyed out. When you have selected all pictures from that folder, click the Upload Now button. | 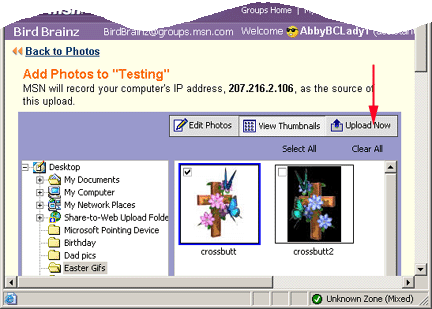 |
| 5. The screen at right opens while the pictures are being uploaded to your album. | 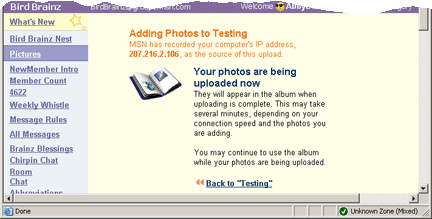 If you wish, you can click Back to "name of album" while this is being done, but I'm a cautious sort. I wait patiently until it takes me back to the album, rather than take a chance on messing something up. |
| 6. When the uploading is finished, it takes you back to your album. You can click on the thumbnail to open the picture | 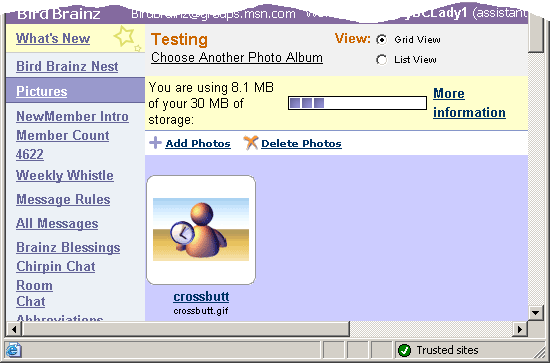 |
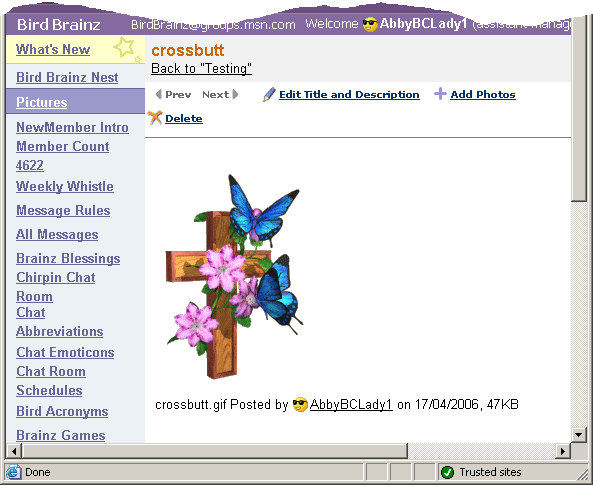
| 7. And the picture is opened. If you are viewing an album, just click prev or next to view the other photos.
|  |

 Important Announcement
