This tutorial assumes you have a working knowledge of PSP.
I used Version 9, but you can do this with any version.
This is my version of how I mist an image. It probably isn't the right way, but it is the way I mist an image. There are many different opinions and different ways of how to mist.
Make sure to read the artist's permission. Misting may not be allowed. Photography Free Sites would most likely be okay.
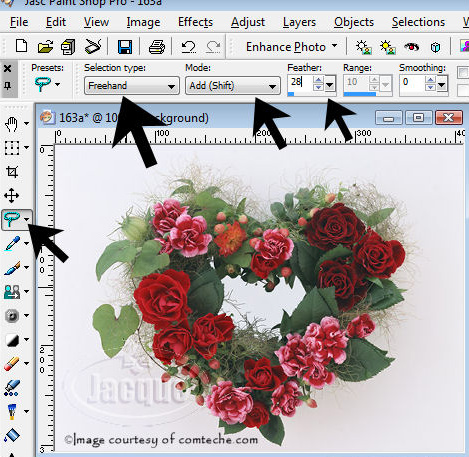
Open the image you would like to mist. I opened a Comteche photo as an example. It has a light gray background.
Click on the freehand tool. I have my settings to it is to the left. It is easier to draw around an image using the freehand instead of point to point. I don't want mine straight. Feather is set to 28, but you can change this slightly. It depends on the image. Sometimes I set it from 25 to 30. Some say use the replace instead of add, but for me Add is the best. You can toggle between those. Many will use point to point, which is fine on some images. I don't want mine straight so I use the freehand.
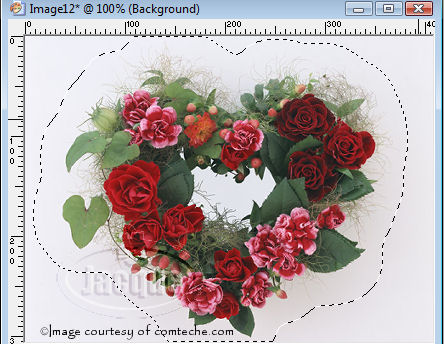
After you have completely outlined your image, and before you right click to end. It will look like the example below.
Once you right click to end, it will show the feathered area
larger as shown below.
Right click inside this area and click on copy.
Open a new image and flood fill with white or color of your choice. Misted images look best on white, but that depends on the image, etc.
"X" out the white background layer for now.
Right click and paste as a new layer on your new image. It will look like the example below.
With this image we have the middle that needs to be outlined. It will look like the example below until you click to end it.
Once you have finished drawing the area, it will look like the image below. Once you have ended, hit the delete key once or more depending on the image. The iimage below shows the middle removed.
Remove the "X" to open the background and the example below is what the finish image looks like misted.
Another way to mist, but I don't care for the results most of the time.
Use the freehand selection tool, point to point, replace, feather 25.
Then you do selection/invert and hit your delete key once or twice.

 Important Announcement


 First
First 