Blue Funk Fairy Tutorial 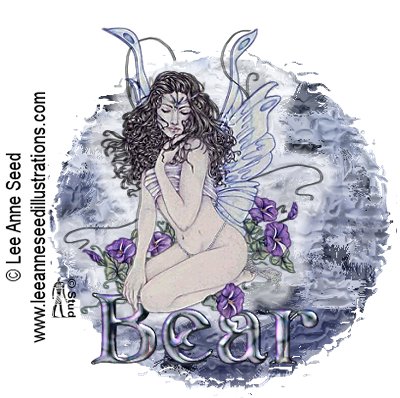 This tutorial is my own creation, any similarity is purely coincidental! This tutorial was written August 5th, 2004. Please feel free to LINK to this tutorial and/or print it out for your personal use, but please do not copy it in anyway to put online, pass out or re-write without my permission ©§tud This tutorial was written in PSP7 but can definitely be done in PSP8! Supplies: PSP a tube of your choice zip file containing font and tube HERE Redfield freeware Craquelure 3D filter HERE Eyecandy 4000 Super Blade Pro (optional as it isn't free) HERE if you use my tube please make sure you use the © details with it... © Lee Anne Seed (www.leeanneseedillustrations.com) check out her site too!
 1. Open a new, blank image 400 x 400 pixels transparent image (16 million color depth). File > New > set size & set color depth
2. Open your tube, copy and paste as new layer into the blank image.
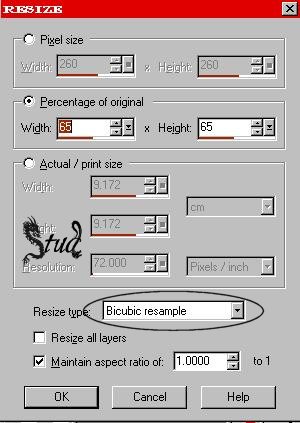
3. Resize by 65% using bicubic resample from the drop down menu and make sure the resize all layers is unchecked and maintain aspect ratio is checked
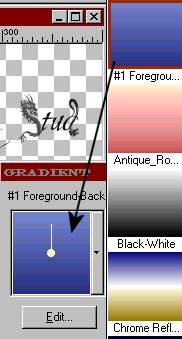
4. Click on the  and select two colors from your tube, right click for background and left click for foreground. Once you have both colors selected, click on your color palette and select #1 from your gradient list. You can invert it if you prefer.
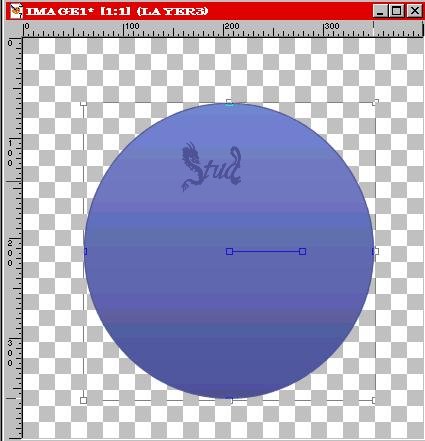
5. Make sure the tube layer is highlighted, click on the preset shape tool and select elipse with antialias and create as vector both checked. Line width on 1.

6. Draw a fairly large circle (it has to cover your tube). Use the node squares (the small squares) to make it circle bigger or smaller to suit you. When you're happy with it, right click on layer pallet and convert to raster layer.
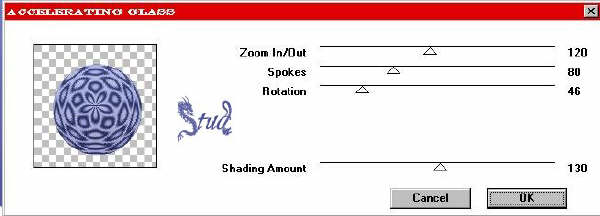
7. Click on effects > plugins > filter factory B > Accelerating Glass and use the following settings... zoom ~ 120, spokes ~ 80, rotation ~ 46, shading ~ 130
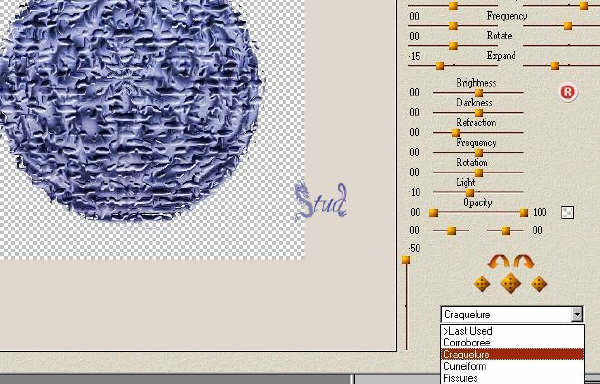
8. While this layer is still active, click on effects > plugins > Redfield > Craquelure 3D and use the Craquelure preset at the lower right side
9. Duplicate this layer and hide the copy by clicking on the sunglasses (the eye if you're using PSP8) You should now have 4 layers 2 of which are hidden.
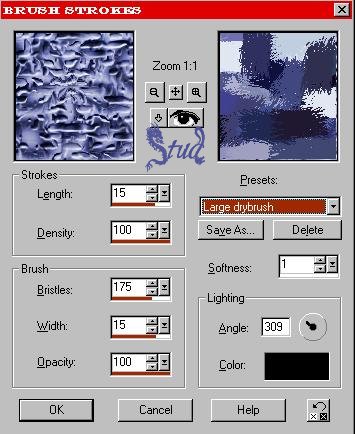
10. Highlight the original circle layer and click on effects > artistic effects > Brush Strokes and use the default settings for Large Brush Strokes (effects > art media effects - for PSP8)
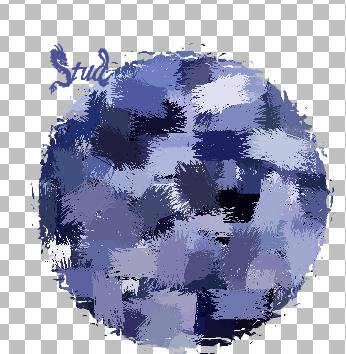
Click OK and it should look like this...
11. Unhide your copy and reduce the opacity to 36. Depending on your colors this may vary.

12. Move your tube from the center to where ever it looks good for your tag (be adventurous and play!)
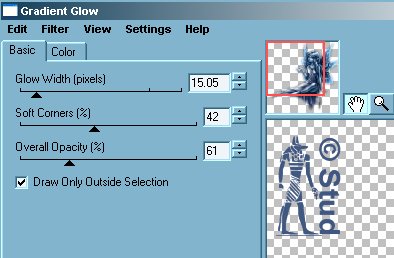
13. With the tube layer highlighted click on effects > Eye Candy 4000 > Gradient Glow. To put a white glow around her with the following settings... Basic Tab: width ~ 15.05, soft corners ~ 42, overall opacity ~ 61... Draw only outside selctions checked. Click on the color tab and make sure that white (#FFFFFF) is selected.
14. Now to add your text... open the font you're using and minimize it. Write the text you want on your tag, vector and antialias both checked and size 65 (or whatever suits). You can change the color of you font if you like... I used black stroke, white fill as I'm going to use Super Blade Pro to change the color.
15. Use the nodes to change the size and direction if necessary then when you're happy , right click and convert to raster layer. If you aren't using Super Blade Pro go to step 18.
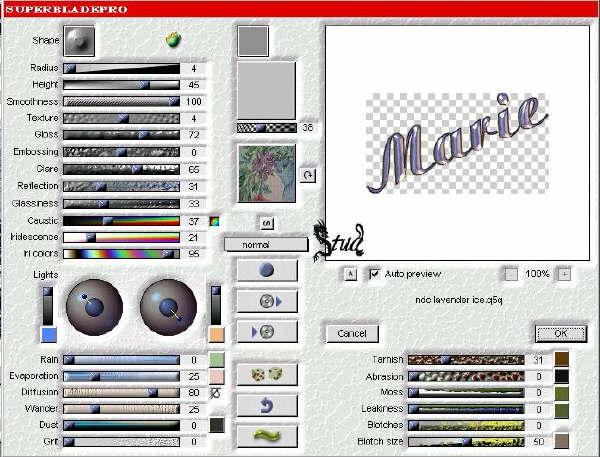
16. If you're using Super Blade Pro to fill your text make sure your text layer is highlighted and click on selections > select all > selections > float... then click on effects > plugins > Flaming Pear > Super Blade Pro... then choose a preset you like... I used ndc.lavender ice with its default settings
17. Click on effects > sharpen > sharpen (effects > sharpness > sharp - for PSP8)
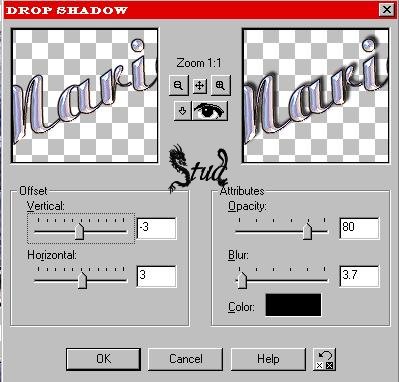
18. While your text is selected add a drop shadow with the settings, v: -3, h: 3, opacity: 80, blur 3.7 and color selected black (#000000)
19. On seperate new raster layers add your watermark and copyright details ... make sure the copyright details are visible... i used font ariel size 10, fill black and stroke set to null with floating and antialias both checked. Move it to wher you like on your tag and deselect ... selections > select none.
20. Click on Layers > Layers merge visible ... crop if necessary
21. Save as a jpeg
And that's it... you've finished.. go ahead and play with fonts and tubes and don't forget to check out the results of my testers by clicking on the link at the bottom
Good luck and have fun!!
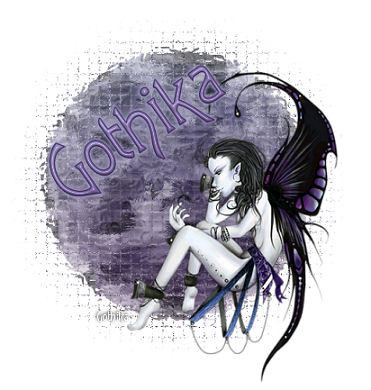
Many thanks to Gothika for trying out this tut in PSP9! Here is her result
I'd like to thank ßear for making the Stud brush i used in my background and I'd like to thank her as well as Charlie and Jane for testing the tut b4 I wrote it out

 Important Announcement