How to Make an EML…or them fancy pages
I have Internet Explorer 5.5/Outlook Express but I suppose it would work for other versions as well. Just find the equivalent command in your version.
First go to your email area like you were going to send an email. Click Message, New Message Using, Select Stationery and then look for the command to Create New........
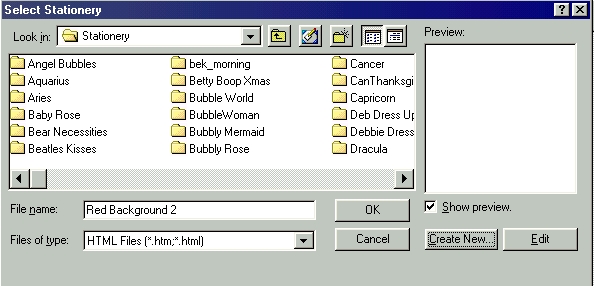
Click that. Bingo ! Up pops the Stationery Setup Wizard. We will use this to start us off. Click Next. Now it wants us to choose a background.
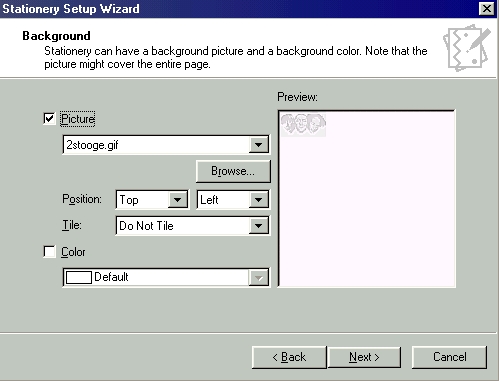
Make sure the Picture box is checked, and then click Browse. This enables you to go to different files on your computer and select a picture to use as a background. So select one and click Open. This will bring you back to the beginning but your background is showing as a little square in the viewing window. You want it to go over the whole page, don’t you?
So click the drop down box beside Tile and select Entire Page. Presto! Now it’s covering the entire page.
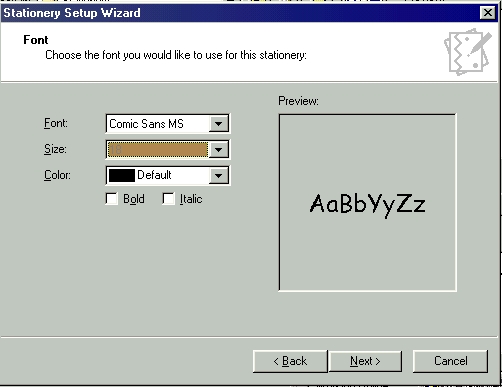
Click Next. Now we can choose the font. It is best to choose a font that is large and easy to read. I tend to pick Comic Sans MS, size 14 or 18, and the color you pick depends on your background choice.
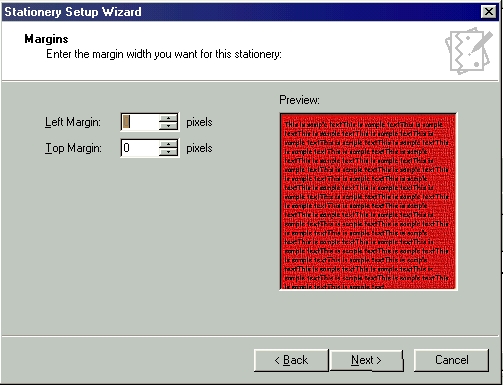
Click Next. Now we can set our margins. Don’t worry, it’s easy. If you have chosen a background with a left border or a top border, just click the up arrow in the appropriate box till you see your text clear the area in the example window. Or if you just have an allover background, don’t worry.
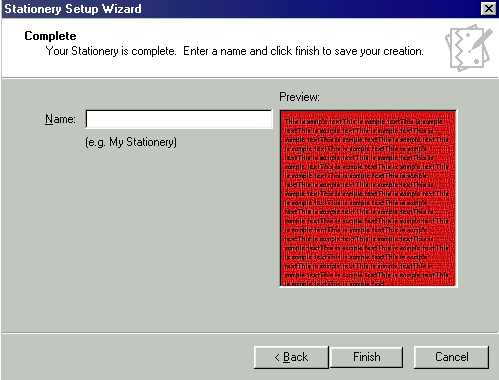
Click Next. Just pick a name for your stationery and click Finish. It is automatically saved in the:
C:\ Windows\ProgramFiles\CommonFiles\MicrosoftShared\Stationery Folder. This is the default area where all stationery is stored ready for use. This will save the basics that we've just done. And they can be reused for another eml or delete these later if you don't want it.
Click the little square at the top right of your screen to make your page bigger. (Restore) Make sure Rich Text is enabled: look in the menu above and click Format and look down the list and click on Rich Text. That will put a little dot next to it. This is because emls are graphic intensive.
Now this kinda looks bare, doesn’t it? Well now we can have fun! Click down in the body of the email, then click Insert, Picture in the Menu area at the top of your screen. Click Browse, then go to the area where your picture is stored, select it and click Open. then click OK.
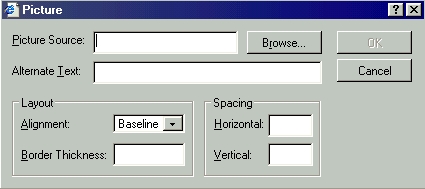
Tada ! Your picture is on display now. If you want it aligned different, like in the middle of the page, click on the pic and then click Center in the Formatting area just above the background area.
You can now type your message or copy and paste your text in from another source. To put a midi file in so your eml can have some music playing as it is being viewed, do this:
In the menu area above, click Format, Background, Sound. Put a dot in the Repeat Settings area so the music will restart itself automatically.
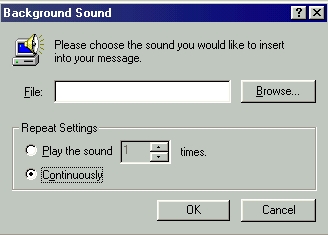
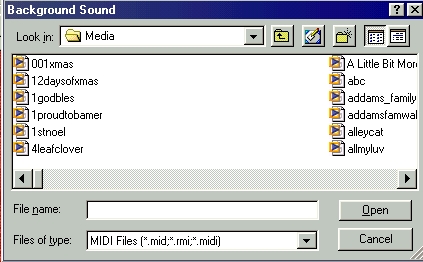
Click on Browse and your Windows\Media area will open up so you can choose your music. Click on File of Type and select Midi. Then select your file and click Open, then click OK.
Woohoo ! You’ve done it! Now for an important part �saving it. Click File, Save As, and make sure you are at the folder where you want to save this. I would suggest putting a folder on your desktop just for these emls or put one in the "My Documents" folder. These emls will not work if they are in the Outlook Express Stationery folder that we used previously. Name your stationery and click Save. Make sure it is being saved as an eml in the file type box. You can go back to your eml at any time and make changes �just be sure to resave it.
Want to use these for your communities? It’s simple. But you must upload them to your communities file cabinet in order for them to work. Then just link to them from either another page or your message board.
That’s all.
Have fun!
Bubbles

 Important Announcement


 Prev Message